Newest progress reports are at the bottom of the page
I will try and update this page with new photos at least every week. The date at the end of the caption is when the photo was uploaded. The actual progress of the layout is a little ahead of what you see here.
April 2019 - December 2020
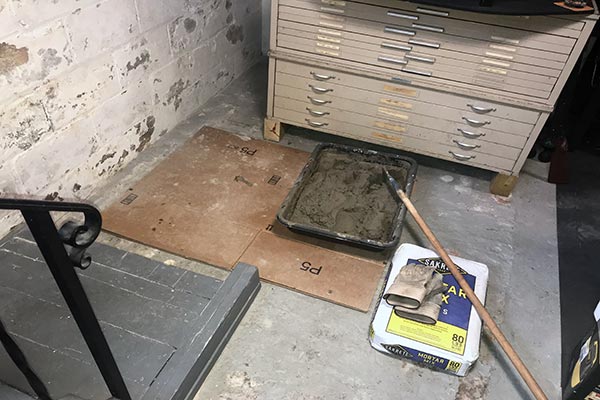
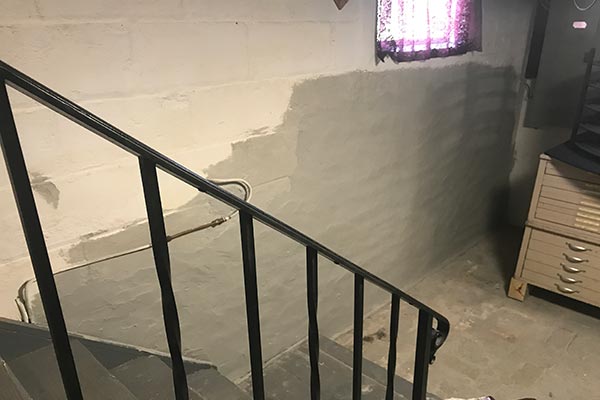
A pan of mixed mortar cement awaits application on the concrete block basement wall between the stairs (left) and the corner where helix #1 is located. The wall damage here was cumulative over the years with heavy watering of flower beds on the outside. (4/9/19)
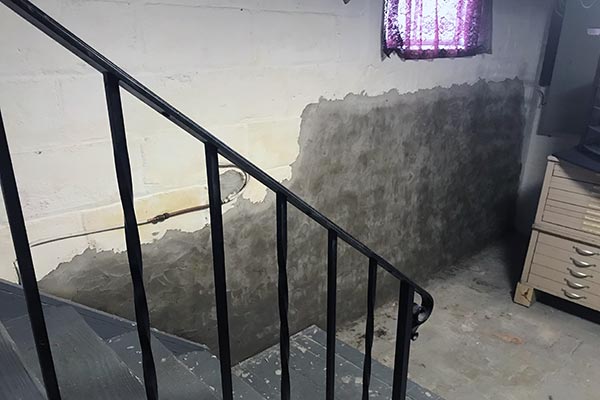
Once the prepping was completed, a good thick coat of mortar filled in the blemishes. The outdoor watering is no longer an issue and once the mortar is cured it will be painted white and disappear into the wall. (4/9/19)
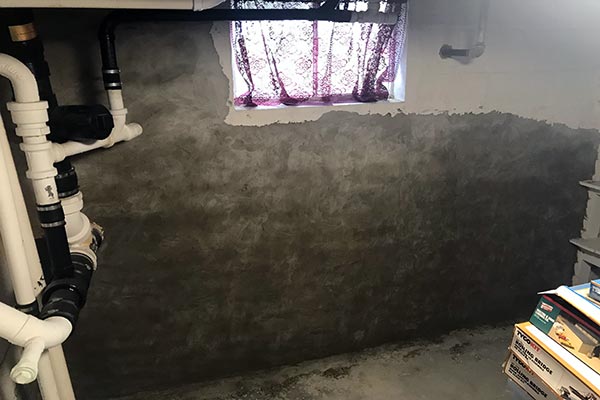
In the area of future helix #2 a more substantial repair was required. The house sewer plumbing is to the left and the stairs support is off the right. This area did have some water seepage along with watering damage. What an ugly and time-consuming job! (4/9/19)
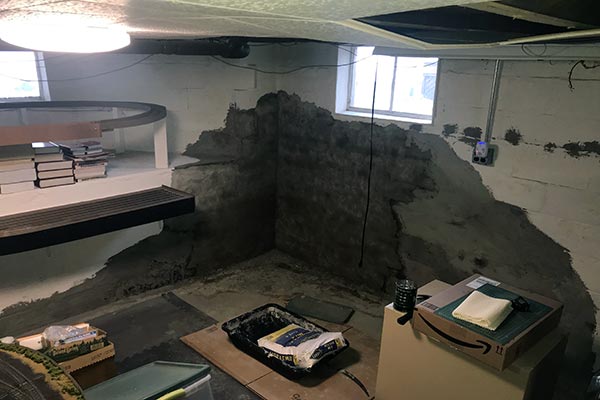
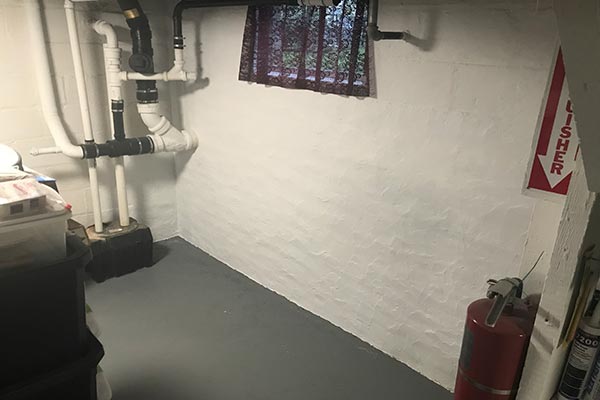
In the opposite corner, curing mortar covers half the wall area while the final bag awaits to be mixed and applied. Water seepage was an issue here. Hydraulic cement as well as changes in the outdoor drainage will hopefully fix this issue. (4/9/19)
After the mortar was completely dry I painted the first coat of a waterproofing paint. I mistakenly bought gray water proofer but still it's only the first coat of two. (4/29/19)
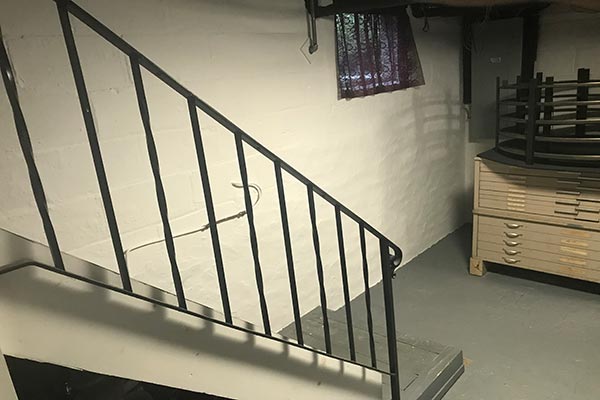
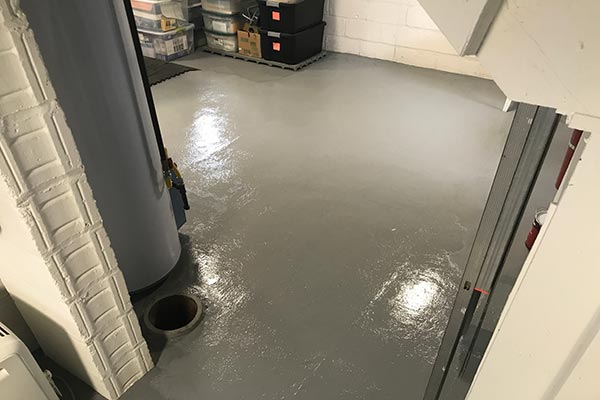
After a second coat the wall looks great! I also painted the floor in this section and the stairs will be painted as well. Things are looking up! (4/29/19)
The more damaged wall on the other side of the stairs is completed and looking equally as good. The floor was painted here too. The sump is for the slop sink which will remain as the layout is built around and over it. (4/29/19)

The final, and worst, area is done with great results. There will be two layout levels along this wall but I don't want to put holes into what I just repaired. Working on some interesting construction ideas for this half of the layout coming up soon - finally! (4/29/19)
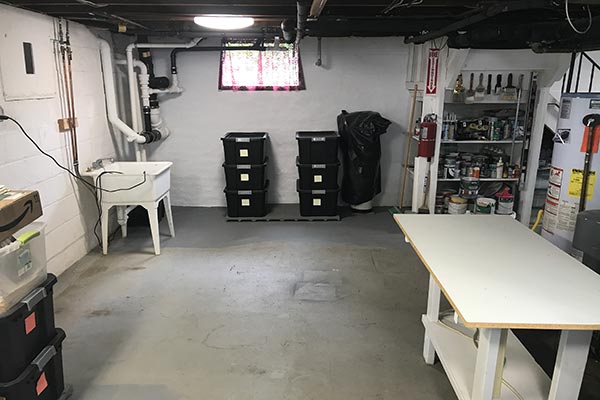
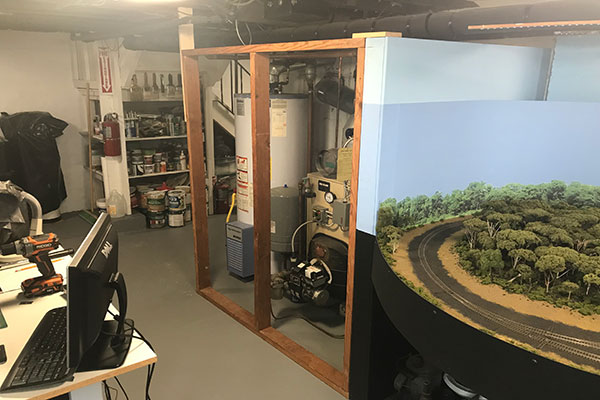
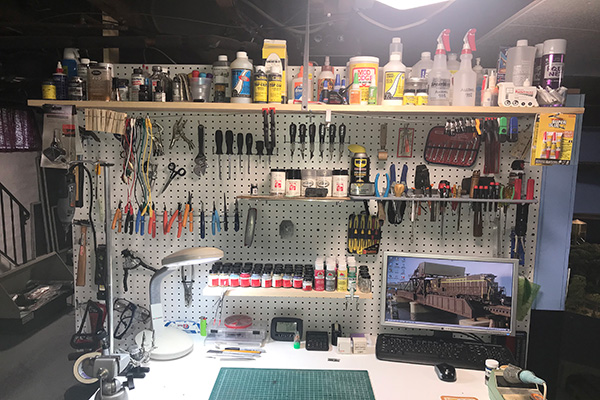
A multitude of projects from new windows, new pool, refinishing my deck, and a ton of house painting has cut, once again, into my hobby. Above shows bins on a cool low profile plastic pallet along with the slop sink and my new work bench. My expansion space is opening up! (7/3/19)
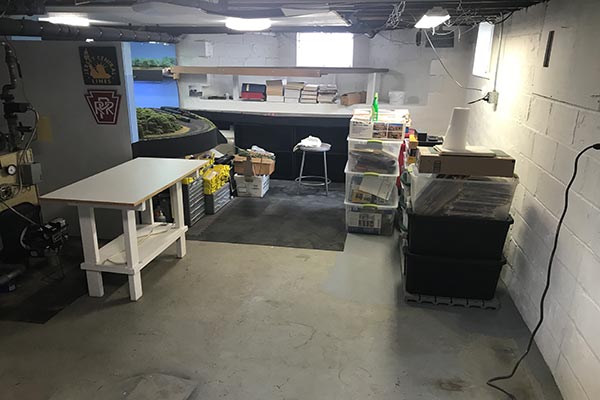
Here is a view in the opposite direction showing more bins on a pallet, the loop and staging. I plan to buy more pallets to spread the bins out to fit under the upcoming layout expansion. The pallets keep everything off the floor in case of water which is unlikely after recent repairs. (7/3/19)
Next I painted the floor to clean everything up and eliminate some of the cement dust which I've been battling in the whole basement and on the layout for months now. What a mess cleaning it off the layout! I also replaced a balky LED ceiling light and started cleaning out accumulating clutter under the existing layout. (7/3/19)
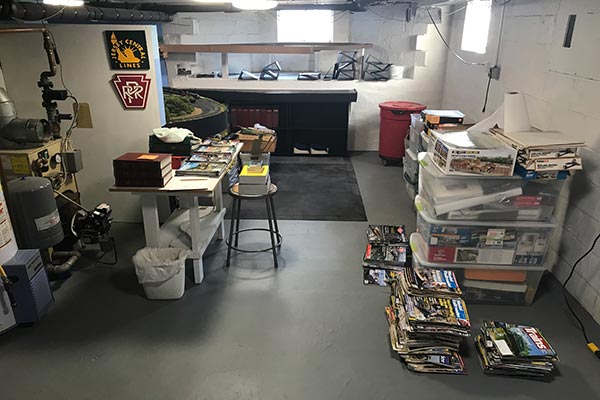
A removable wall is planned along the work bench to hide the mechanicals and give me peg board space. Things are shaping up! My latest project has been going through years of modeling magazines and placing them in binders - the ones that aren't digitized. Any takers for a pile of old MRR magazines? (lower right) (7/3/19)
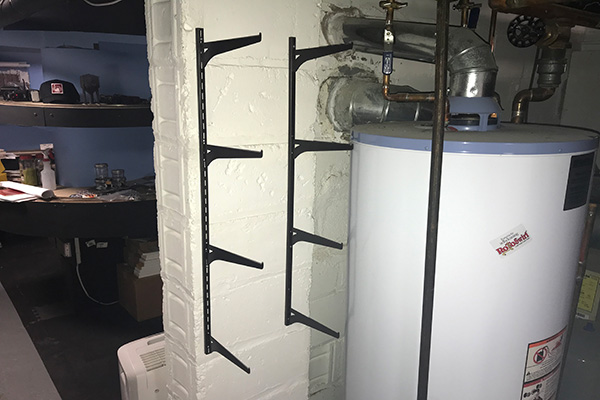
I need a place for my parts bins which used to sit on my old work bench. This looked like a good spot...under-utilized space. So I hung two 2x4s from the joist above. (7/18/19)
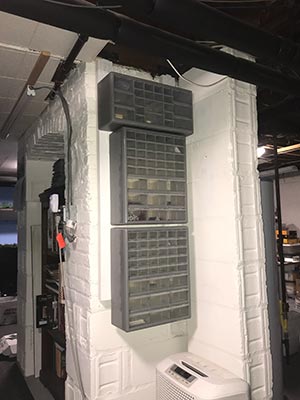
My parts bins now have a new home. Most of the drawers are empty and awaiting the parts and labels that have been scattered unorganized in the past. (7/18/19)
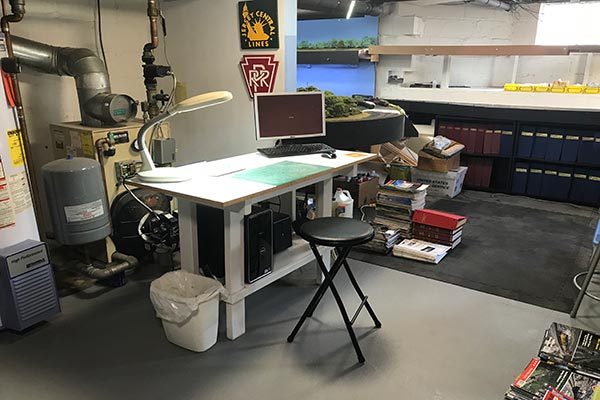
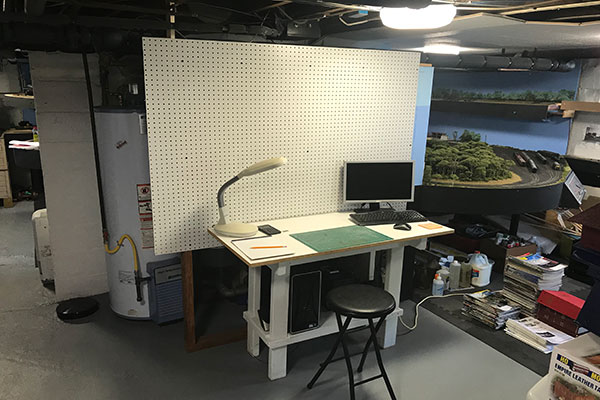
My new work bench is up and running along with my computer system. The magazines are still being organized and stored (background) (7/18/19)
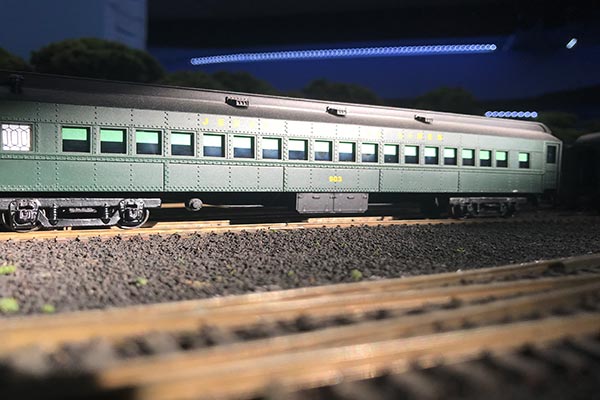
A ray of sunlight caught a CNJ coach on the loop recently and I thought it would make a nice photo. Things are moving along! (7/18/19)
Hot and humid weather sent me heading for the basement. Among other things, I threw together the framing for the workbench wall. (7/28/19)
Pegboard is next while the entire wall can be removed to service the mechanicals by simply removing five screws. (7/28/19)
Pegboard goes up. The bottom of the wall was left open due to the proximity to the furnace. Putting up this wall has made this half of the basement feel a bit smaller but has added perspective to the future expansion. (8/12/19)
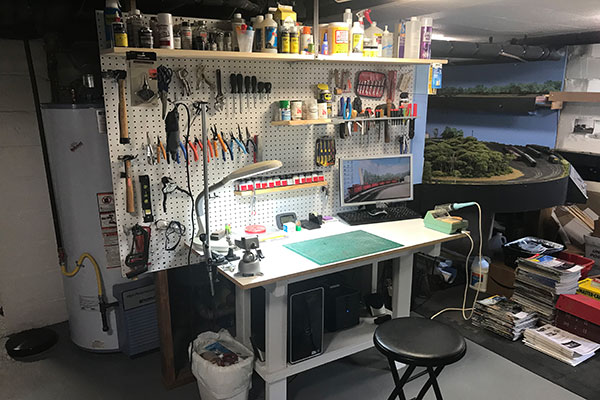
Five bins of modeling stuff and tools have been unloaded and mostly organized. So far I prefer this workbench over my old one - mostly because the smaller size will keep me from cluttering it up! (8/12/19)
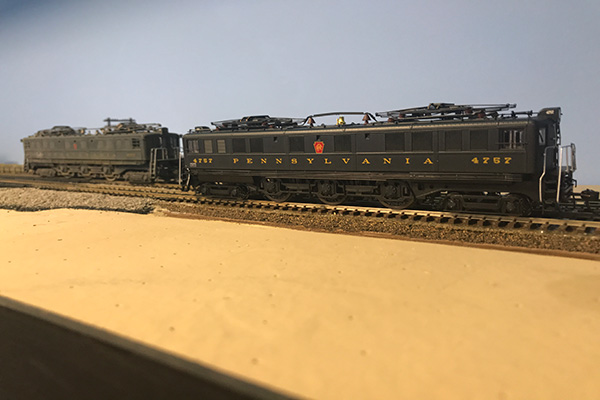
Here is one of my last purchases of motive power for the layout ( I think). It's a BLI P5 freight motor which will be confined to the South Amboy area and points north on the upcoming expansion. It's a beauty, complete with sound, but will need some serious weathering. (8/22/19)
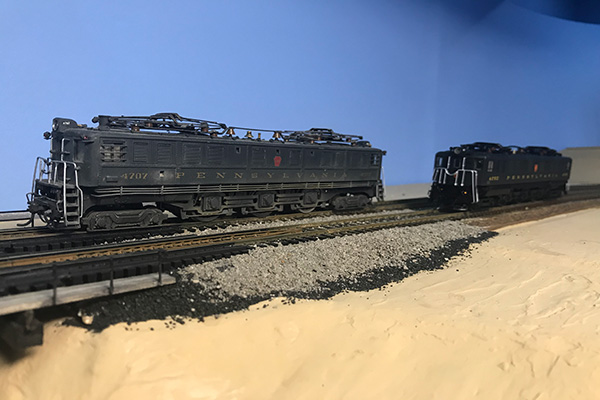
Ahead of the BLI model is my old Alco brass P5 which is weathered to the extreme. This is how they looked in the 1950s hauling freight drags in and out of South Amboy in the 1950s before they were retired. I have to say it holds up very well against the new kid on the layout. (8/22/19)
While continuing to clean up the last of the loose clutter and tools, I found the need for some more shelving. Some cheap parts and an unused space came together. (9/2/19)
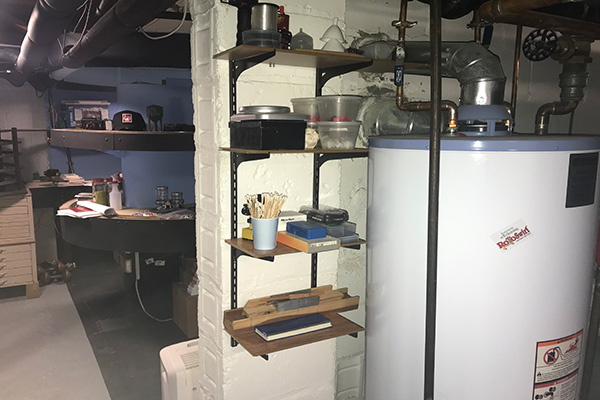
The new shelving is done and occupied. A quick and dirty solution. Now everything I need at hand is organized and at the ready. (9/2/19)
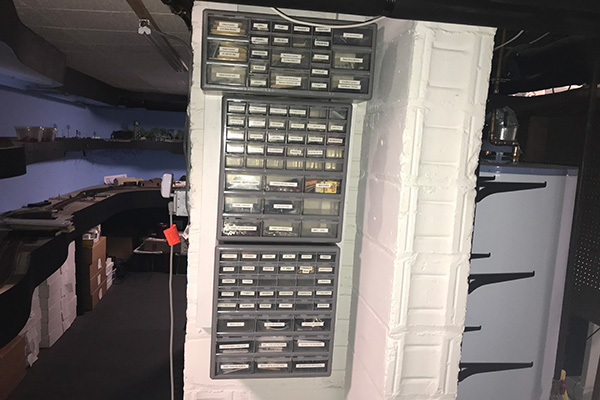
A major part of the basement organizing was the separation and organization of small parts, tools and hardware. The bins I mounted earlier served me well and are mostly full and now labeled. I used a labeling machine I had kicking around. A lot of parts I had forgotten I even had! (9/2/19)
Here is the final layout of my new workbench. All materials involved with future construction are in boxes under the layout. Now that the organization is completed the next project is to dismantle the temporary loop and do the last of basement wall work. No cement work, I promise! (9/2/19)
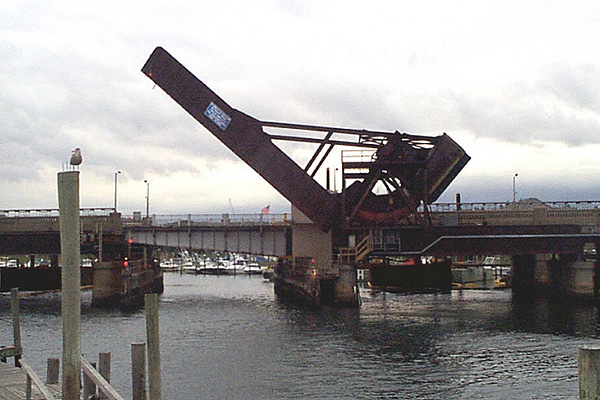
Here is a photo of the Shark River draw in Belmar with the Route 35 highway draw in the background. This was taken in the 1990s before the highway bridge was elevated, eliminating the bascule draw. (9/23/19)
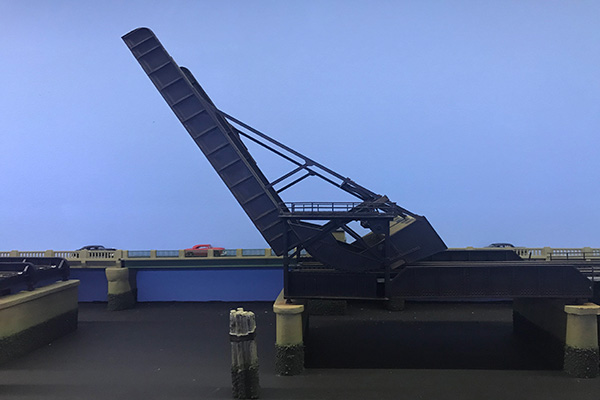
Here is my uncompleted version of the same scene. Work in the basement continues with sorting and organizing. I'm about to dismantle the temporary loop and fix the walls behind it which will be shown in the next update. (9/23/19)
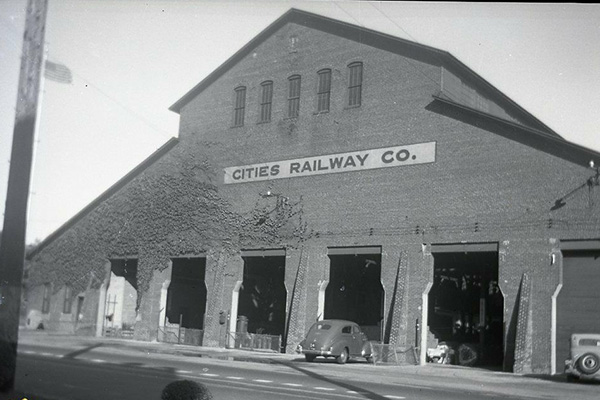
Just a stone's throw away from the Allenhurst Coal dock was the Coast Cities Trolley barn. This was the hub of a trolley line that encompassed most of Monmouth County in the trolley heydays. By the time this photo was taken, the trolleys were long gone and the barn was now used for auto repairs. (10/11/19)

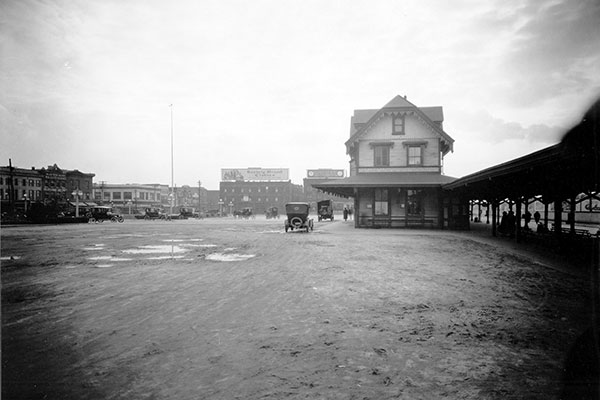
Manasquan Station on the Freehold Agricultural line taken in the 1950s. The house on the left still stands at Broad and Atlantic Avenues. Notice the coal dock center and right. I wish I could model this but space limitations said NO WAY! Still, it's part of the NY&LB history and that's what I'm trying to get out to everyone. (10/11/19)
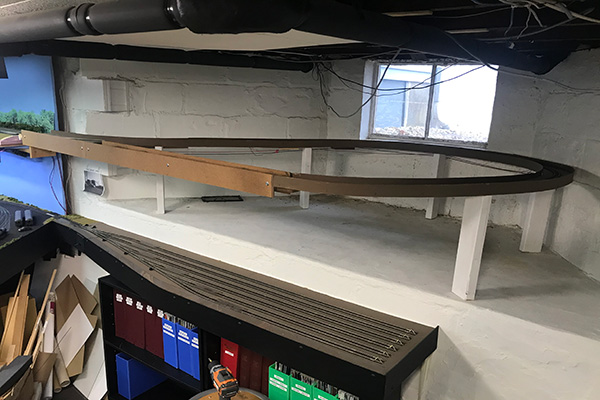
After finally completing the LONG-running kitchen renovation and several other incomplete house projects, I've once again migrated to the basement. First order of business was to remove the temporary reverse loop. It did it's job, but not to the extent I had hoped when I built it six years ago. (12/13/19)
The loop was meant to be temporary so it wasn't difficult to remove it and break it down. Initial plans have the upper level continue from the left across the open area and turn at the far right wall. Notice the newly-organized magazine binders in the book shelves. That project cleared out a ton of clutter. (12/13/19)
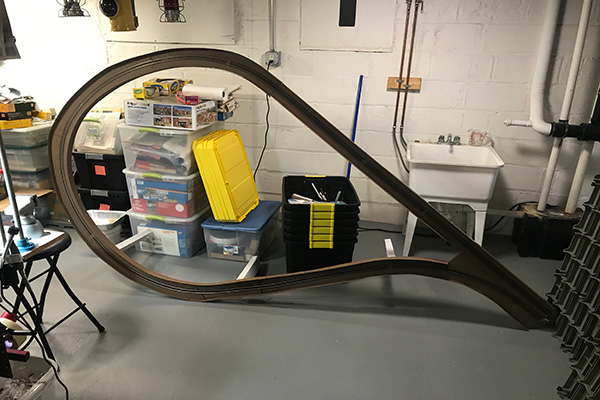
The reverse loop awaits disassembly. I attempted to salvage the Atlas code 83 flex track but it was an unsuccessful attempt So I pulled the rails for future turnout construction. A stack of new modular bins will replace the remaining mess on the left. (12/13/19)
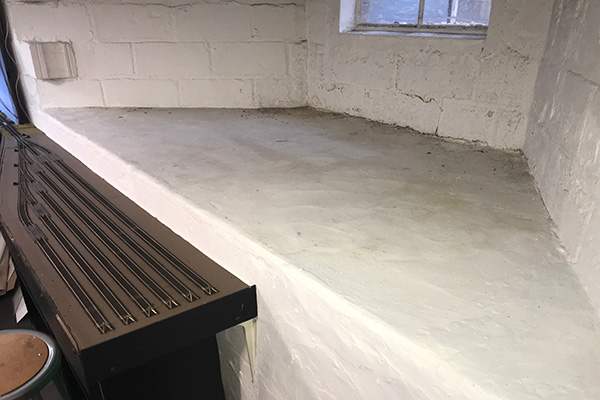
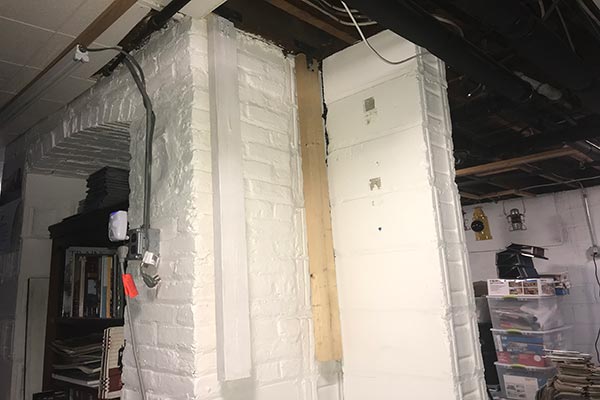
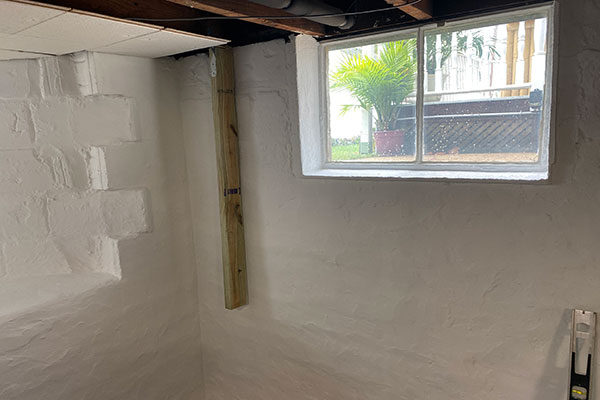
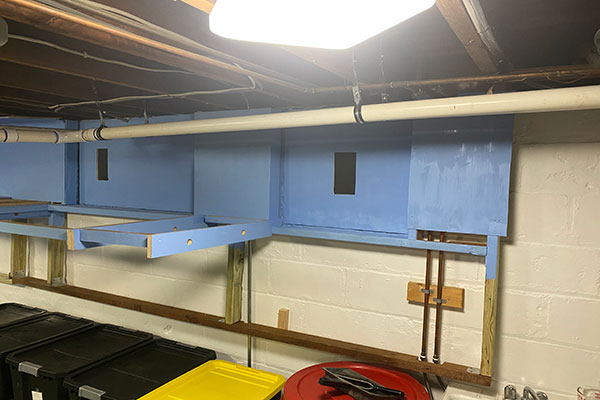
Some minor work is next up for the alcove. Wires need to be secured and the concrete base and walls will get an application of waterproofing white paint. The recently repaired basement walls have done the job with not a hint of water leakage. (12/13/19)
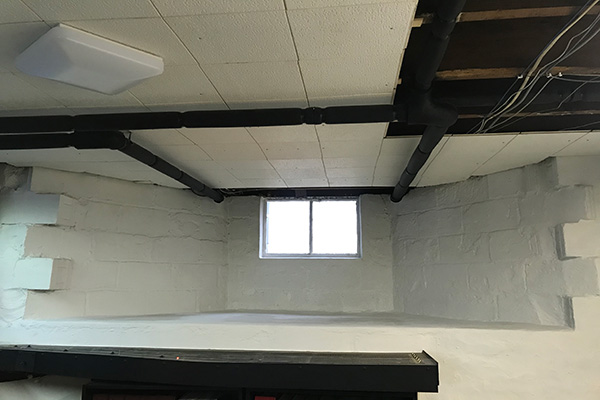
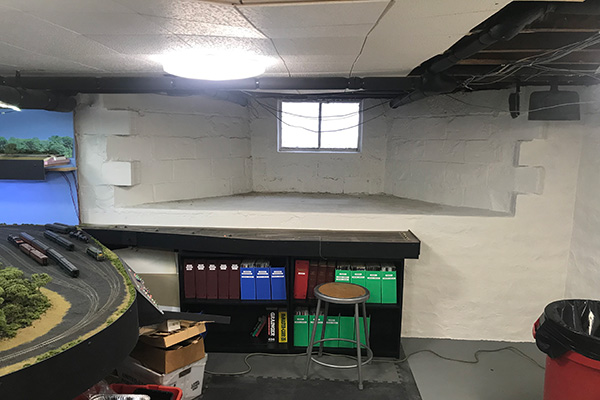
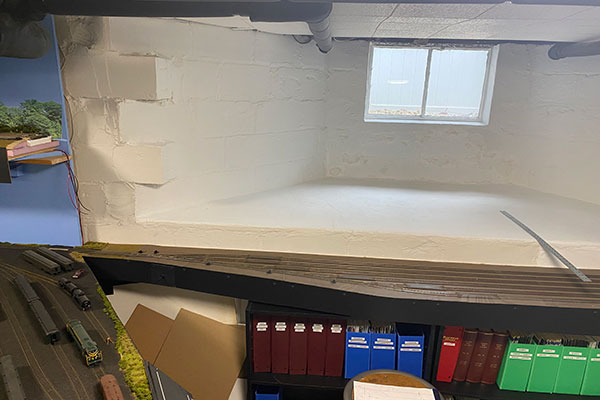
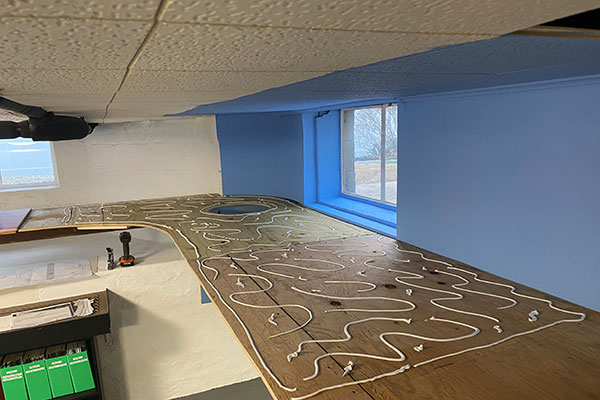
The waterproofing paint is applied and the ceiling tiles have been extended toward the window. I plan to use this alcove for Amboy Staging and needed to protect the area from falling dust. It also brightens up the alcove. (12/14/19)
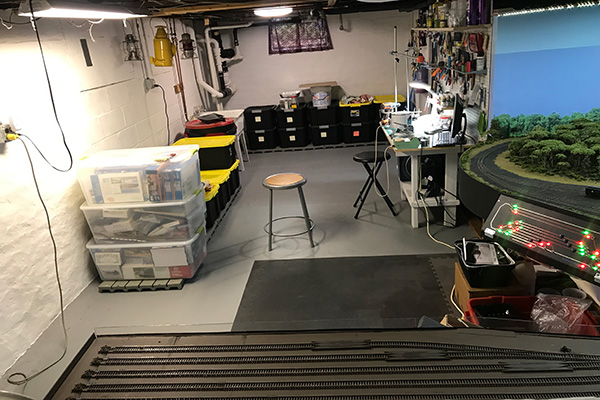
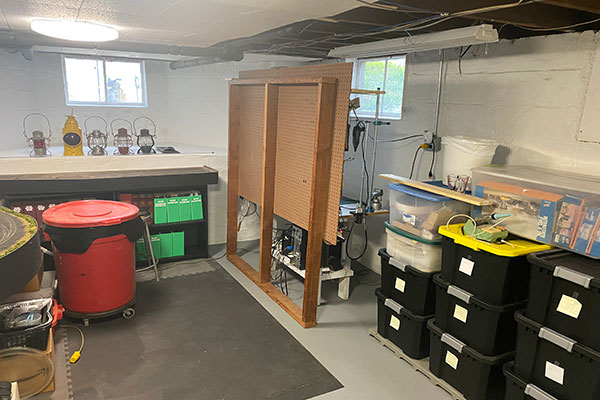
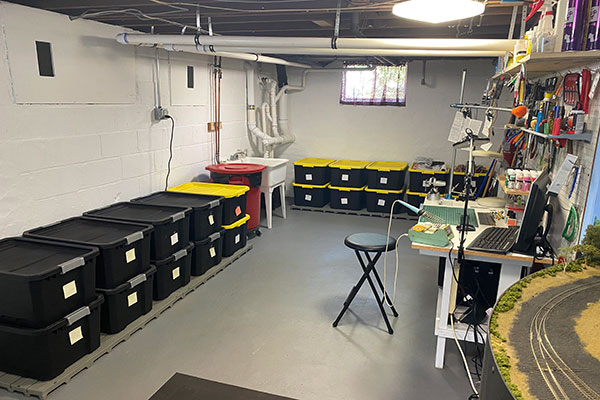
The basement looking from the alcove shows Bay Head loop on the right and the bin project almost completed. Stacked two high, the black bins will store nicely under the upcoming lower level of the expansion. (12/14/19)
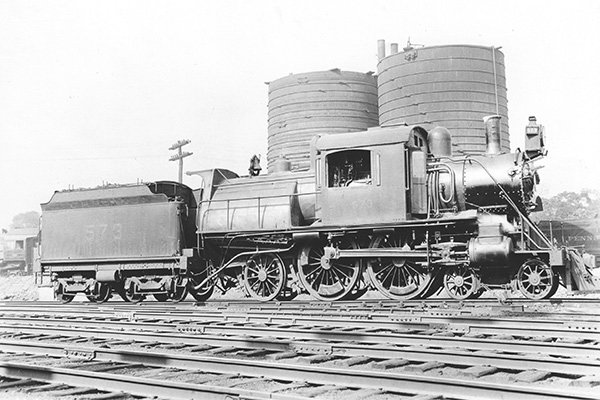
I've been busy sketching out the second half of the layout on paper before cutting the first piece of lumber. Above is CNJ Camelback 573 in front of the dual water tanks at Point Pleasant Yard in the 1910s. (1/5/20)
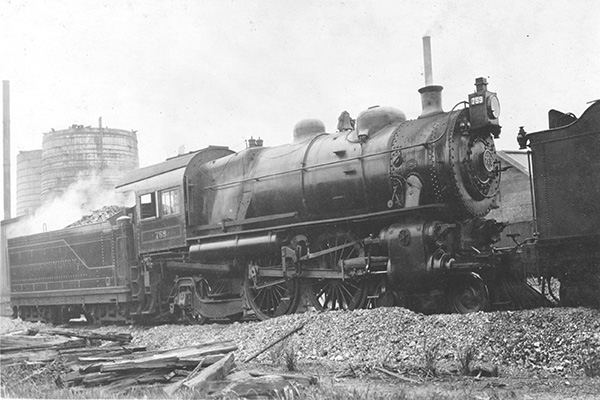
Here is PRR E6s 759 at the Point Pleasant Yard in the 1920s. This yard closed in 1930 when the Bay Head loop yard went fully online. These scenes pre-date my modeling period but remnants of the facility remained in the 1950s. (1/5/20)

A new tool for the workbench! This lighted magnifier is a god-send gift from my wife. Otherwise, I've been sketching dozens of possible configurations for the next phase. I want to include the NJS yard at Red Bank along with the small turntable that was still there in the early 50s. I really want to include the NJS line beyond the yard into some kind of one or two track staging below the tracks approaching Red Bank. (1/27/20)
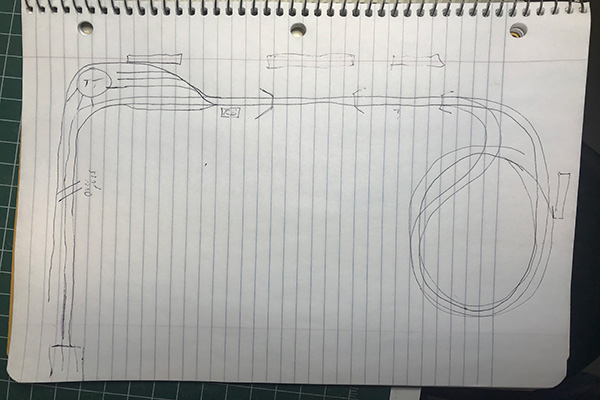
Above is one of my rough sketches. The approach to Red Bank is on the left with the town upper left. The Navesink River trestle is center and the helix on right. I'm trying to incorporate Matawan into the top of the helix with connections (to staging) with the Freehold and Highlands CNJ branches. Want to get it down pat before construction starts. Everything else is done and ready for the next phase. (1/27/20)

First of all I hope everyone reading this is staying safe and well in this virus crisis gripping the world. Both myself and my wife are considered essential workers so we continue to go to our jobs while millions are staying at home. We recently decided to fast track our final home improvements this year which will affect the basement one last time and, thus, the layout. Heating systems by May and sewer work in August. (3/22/20)
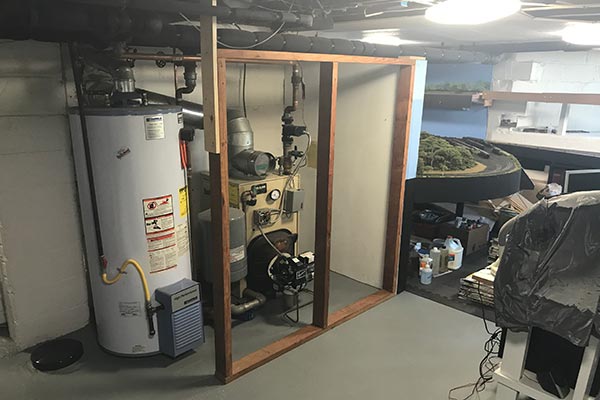
The first is to replace all the mechanicals (upper left). The oil furnace and gas hot water heater will be replaced with a single gas fired unit. This will free up a lot of space behind my work bench (not to mention the removal of an underground oil tank). The second project involves replacing the old sewer line exiting the house and much of what is shown above. Layout work will move forward but at a slow pace until this work is done. (3/22/20)
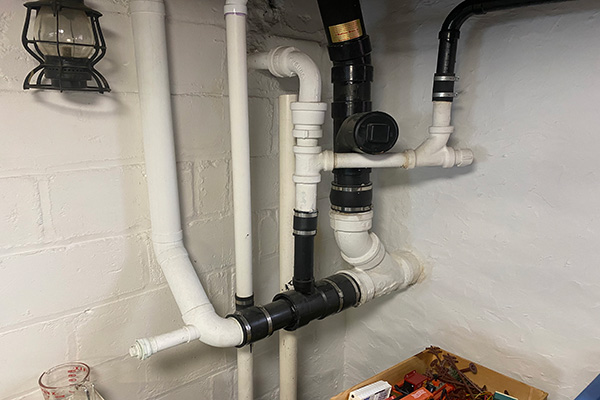
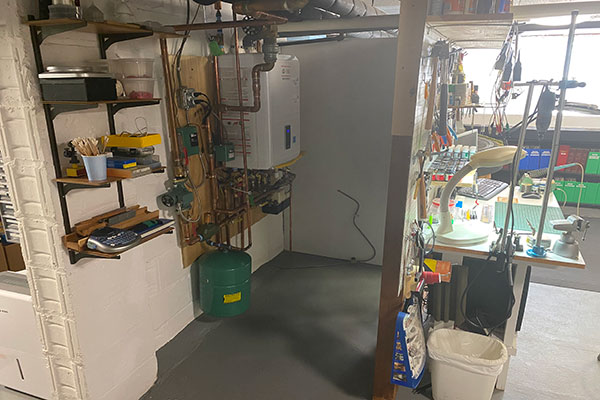
Sorry for the lapse in updates everyone. Have had NO time to work on anything, layout or otherwise, with the present pandemic and work schedule. However, the new heating system has been installed in the basement (above right). A neat little system that handles heating the house and providing instant hot water. The white pvc pipes are vents. (6/7/20)
Before the new system was installed, I had to move my new work bench over to the other side of the room. It is waiting to go back but first I need to modify the peg board and upper frame to fit under the new pvc exhaust vent pipes. This project is paramount to moving forward along with the upcoming sewer line replacement in August. (6/7/20)
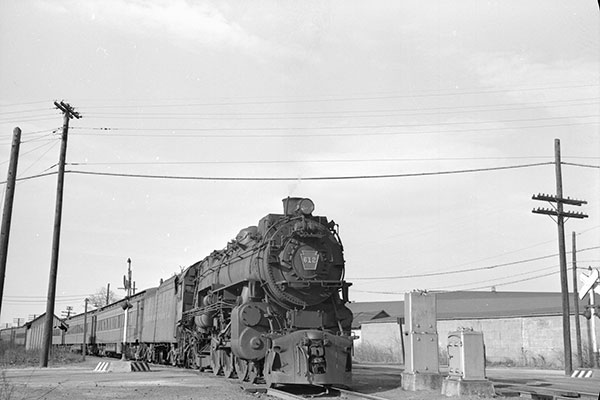
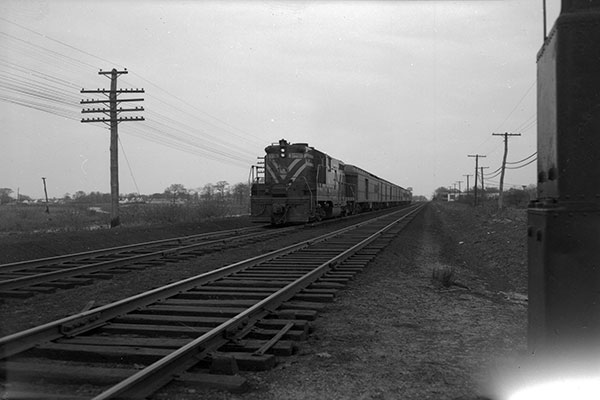
On the prototype, PRR K4s #612 crosses Osborn Avenue in Bay Head as she heads into the loop and the end of her run from South Amboy in the mid 1950s. (6/7/20)
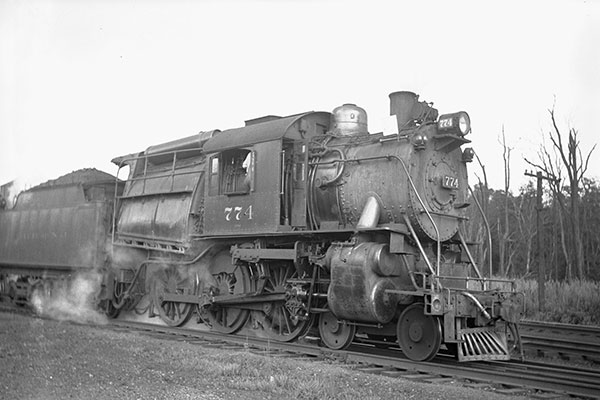
CNJ Camelback #774 is parked at Bay Head Junction in 1938. This engine would be the last of CNJ steam to run on the Branch in 1954. (6/7/20)
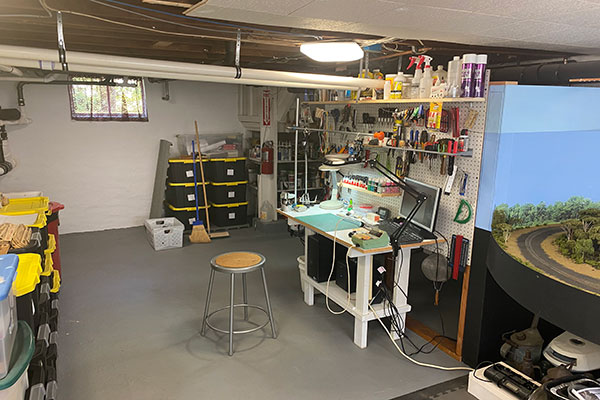
Had a free afternoon this holiday weekend and tackled putting my work bench back together. I had to cut it up a little to accommodate the new furnace vent pipes, but it's now like nothing ever happened! I took pictures of the bench and wall before disassembly which were invaluable in getting everything back in its proper place. (7/5/20)
The new open space behind the bench is going to be put to good use. I may put some shelving on the far wall and will probably use the floor space for several bins of layout kits waiting to be built. Only six more weeks until the sewer pipes in the basement are replaced and then I have the green light to start construction! Can't wait! (7/5/20)
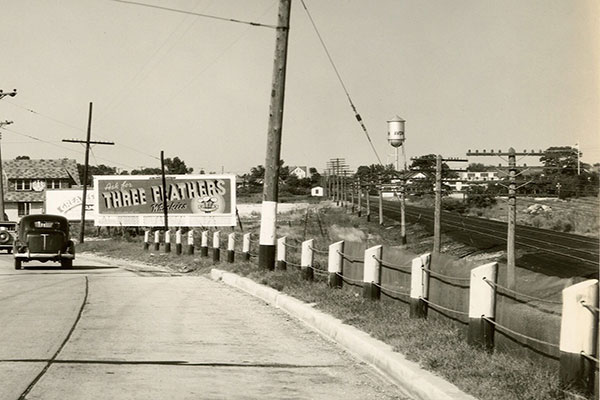
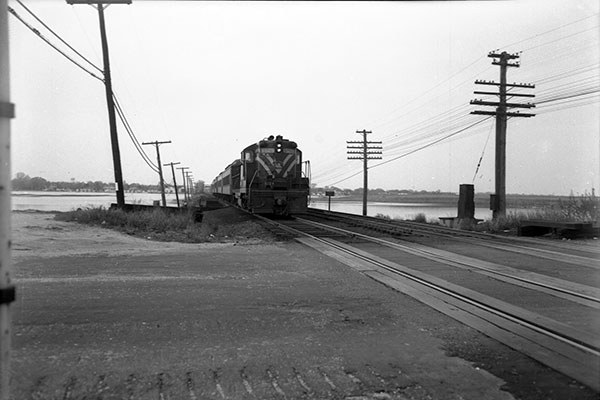
It's 1937 and the NY&LB is sporting a fresh coat of cinders on its track bed. The highway is Route 35 heading north into Neptune. The Shark River and Belmar is to the camera's rear. The big house and the Sylvania Avenue wooden overpass I'm modeling is in the center, just right of the utility pole. (7/12/20)
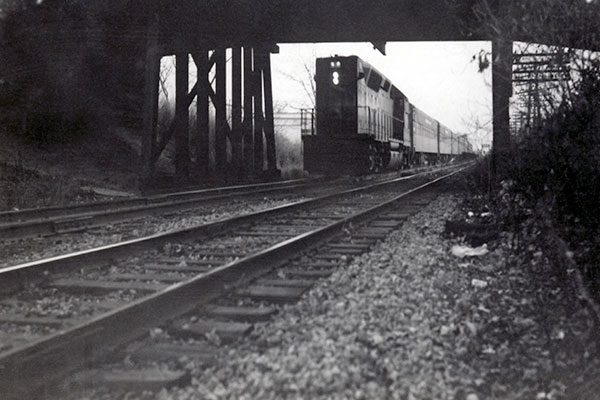
A CNJ GP-40 passes under the Sylvania Avenue overpass as it brings its commuter train north to New York City. Not sure of the date here but this was probably taken around 1973-74. The pole line is still full of cross-arms and the road bed now has the familiar grey rock over the old cinders. (7/12/20)
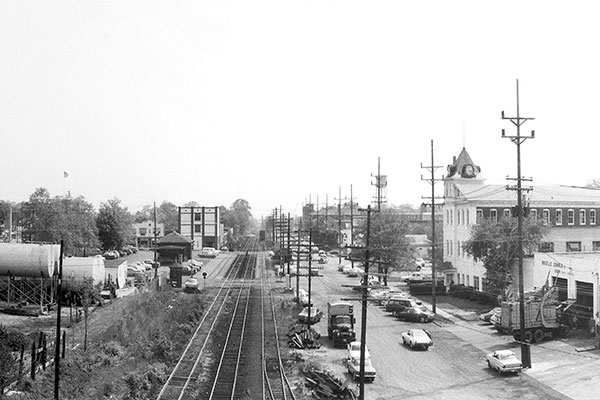
Bradley Beach in the early 1970s on the NY&LB. This view is looking south from just north of the station (left). How many landmarks are still there today? (7/27/2020)

Turn the camera north and here's the view showing the Bradley/Neptune Yard and freight station. By this time the yard was already shrinking in size. (7/27/2020)
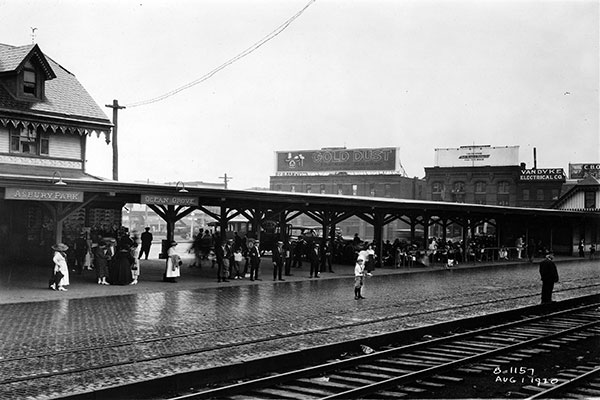
The Asbury Park-Ocean Grove Station is shown above in August 1920 on the NY&LB. The standard ornate CNJ Asbury station is on the left with the lesser CNJ standard station for Ocean Grove on the right. Love the passenger shed. (8/1/2020)
Here is another view of the Asbury Park Station from the rear parking area in December 1920. The passenger shed was huge, extending from beyond the Ocean Grove station to the south to well beyond the Asbury Station to the north (right). (8/1/2020)
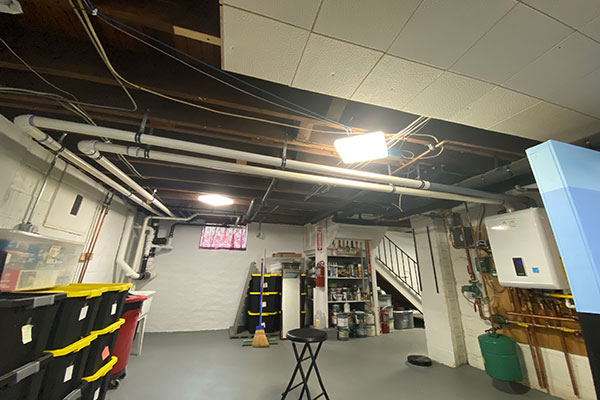
Finally..... the basement is ready for layout construction! The sewer lines have been replaced (center background) and the mess has been cleaned up. Another fresh coat of paint on the walls and floor as well. (8/24/2020)
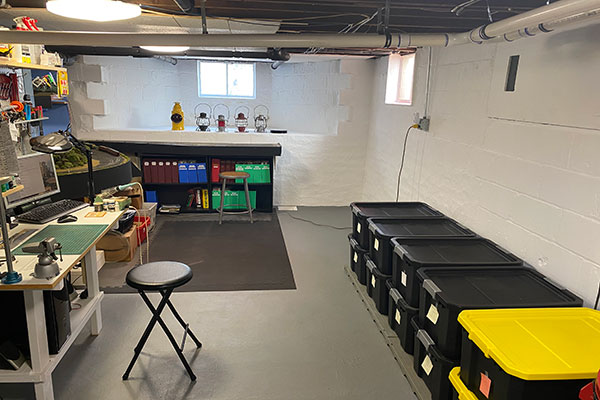
View from the opposite direction. Most of the woodwork will be done outside and brought in. Just have one wall outlet on the right wall to move over to the work bench (left) and another to lower. Making my lumber list this week. Yea!!! (8/24/2020)
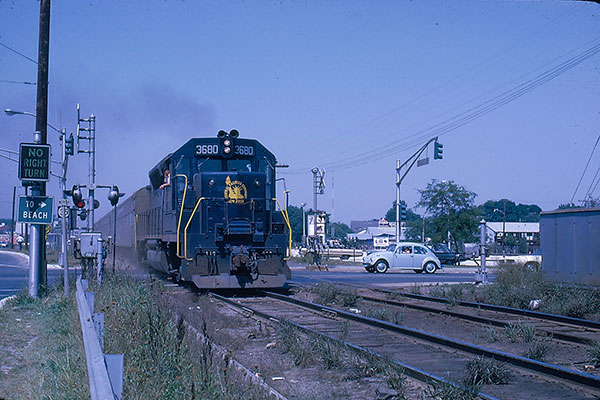
CNJ GP-7 #1529, cab first, heads westbound into Point Pleasant Beach in 1954. The crossing is Broadway. In the basement, one electric outlet has been moved over to the workbench. The second outlet will be moved lower on the wall this week. (9/13/2020)
At the same crossing, #1529 returns eastbound from Bay Head a few hours later, still cab first. I've been working on the final details of supporting the new addition as well as making a lumber and fastener list. Construction photos coming soon! (9/13/2020)
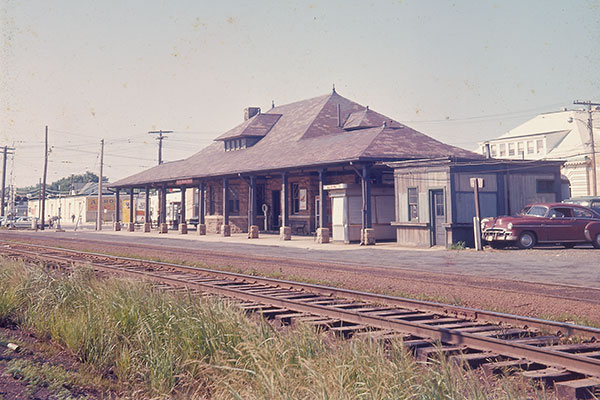
The Point Pleasant Beach Station is shown here in the mid 1960s. The basement is finally ready for new construction. I've decided on a pretty interesting way to support the layout expansion, which I'll share very soon. This part of the basement remains bone dry but I'm still going to treat the base construction materials as though it's still damp down there. (10/5/2020)
A westbound CNJ commuter job departs Point Pleasant Beach station in the mid 1970s. The old stone station (left) and on the left above is long gone. Notice the deplorable ROW conditions. New construction is about to happen - BUT - I've been cleaning up the rest of the layout first from all of the dust and debris from the past couple years of house construction. (10/5/2020)
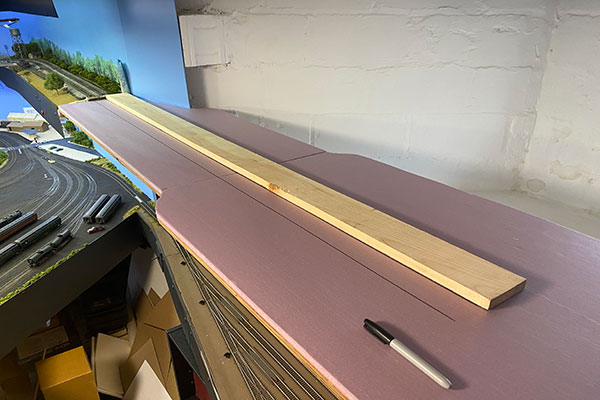
After many questions and requests from followers, I've decided to include Long Branch on the layout! It will be severely compressed between the end the existing layout upper level (left) and the ruler on the right, marking the start of a 36 inch curve. Long Branch will include the station (newer 1950s one), the NY&LB headquarters building, and one, possibly two yard sidings, depending on what I can get away with on the width. (10/12/2020)
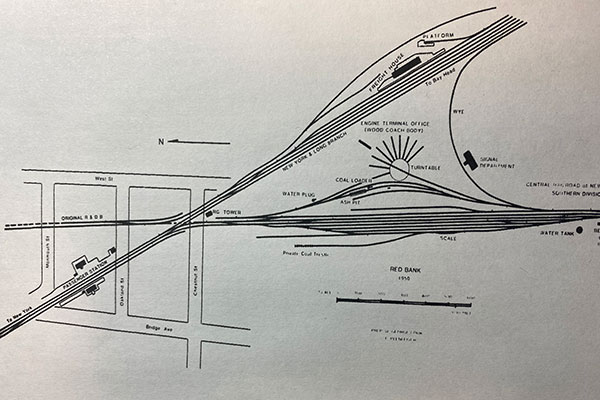
Honestly, how can you model the New York and Long Branch RR and not include Long Branch? After the curve out of Long Branch the upper level will head into Red Bank. Above is a track diagram of the intersection of the NY&LB and the CNJ Southern Division in 1950. The NY&LB runs diagonally, south (RR west) is to the right. I'm going to model the turntable and as much else as I can in the space I have. (10/12/2020)
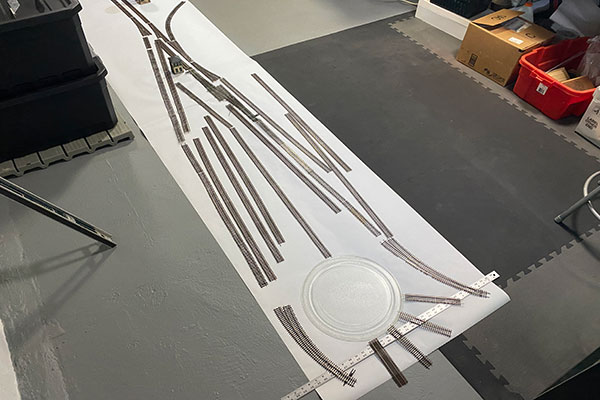
The upper level will be about 30 inches wide as shown above on the roll paper. Compromises - the CNJ turntable (lower) has to be switched 180 degrees from reality. The Southern Division tracks and yard (left) will run into a two track staging under Long Branch. The NY&LB Red Bank Freight Yard is on the right. This was a busy yard and I plan to include as much trackage as possible. The freight house might have be jettisoned. (10/12/2020)
The plan from the opposite end. The various structures depicted are from top - Bank Tower, the water tank, Red Bank Station, and the Eisner complex depicted by the box and Walthers catalog. At the bottom the double track mainline will cross the slop sink (Shrewsbury River) and curve into the helix. That's a whole other issue I haven't yet tackled. The Red Bank Bridge might end up being a curved bridge (yikes!). And Matawan is looking to be tucked into the helix. (10/12/2020)
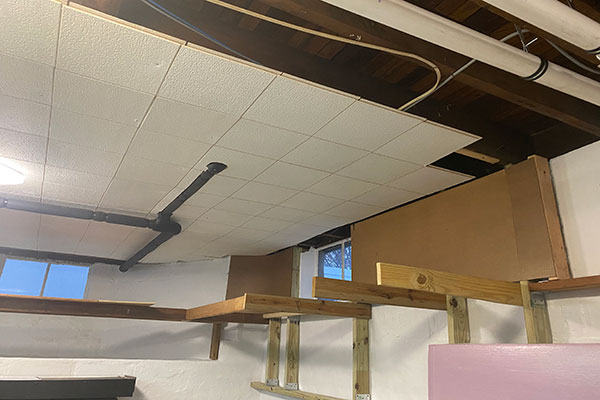
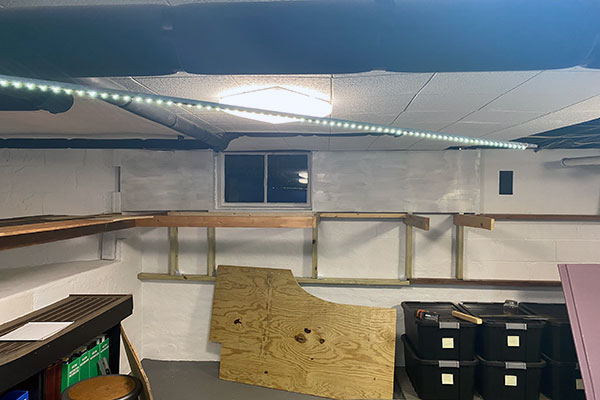
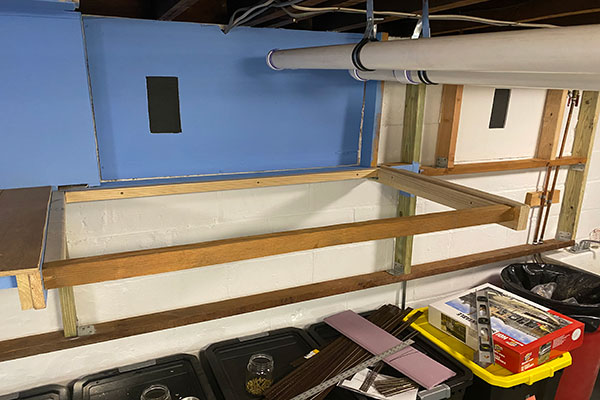
Let phase two construction begin! The first 2x4 of the second phase of my NY&LB layout has been hung. This part of the layout is going to be supported by a hanging framework from the above floor joists. This method keeps the lower 3 feet clear of obstructions for storage. (10/17/20)

Meanwhile, I'm planning to use the ME Yard Ladder turnouts for the NJ Southern Yard and Red Bank Yard. Above are the paper templates of the ladder system on my kitchen table. This system appears to give the best jumping point for a compact and functional yard in a tight space. (10/17/20)
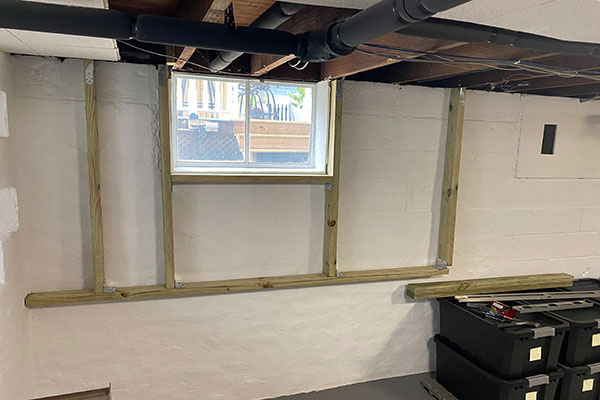
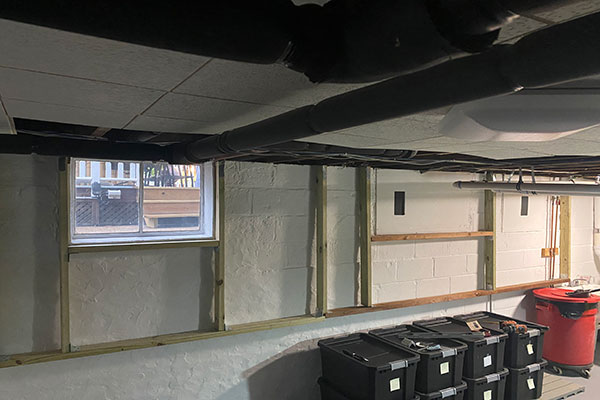
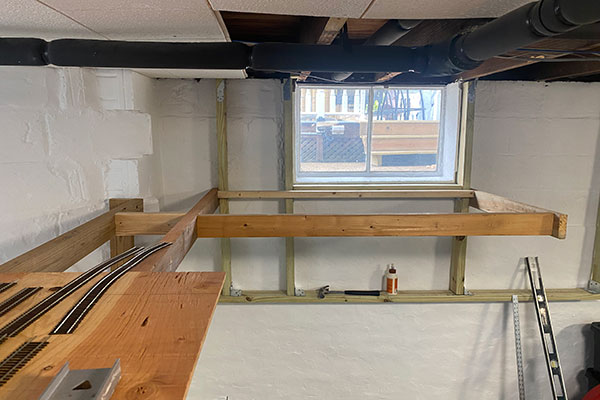
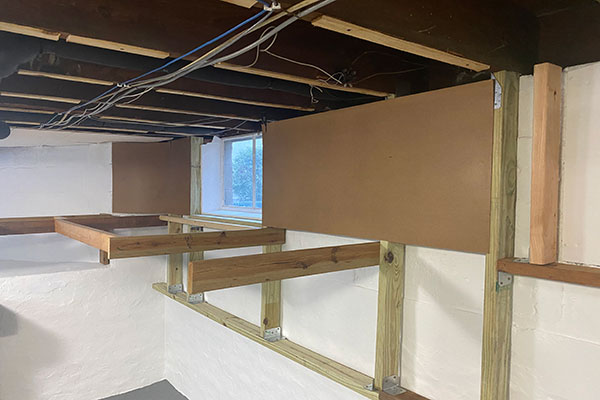
The wall framing for the layout extends to just below the lower level height. I'm using pressure treated 2x4s just in case any moisture creeps into the scene. (10/17/20)

This wall will be covered with a backdrop covering, probably hardboard. Notice the window is framed and will possibly get a portable covering when needed. (10/17/20)
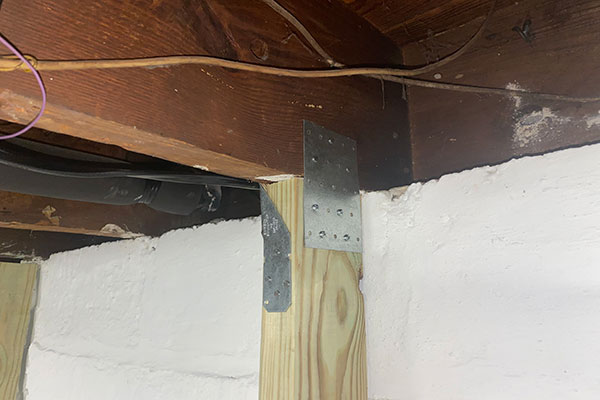
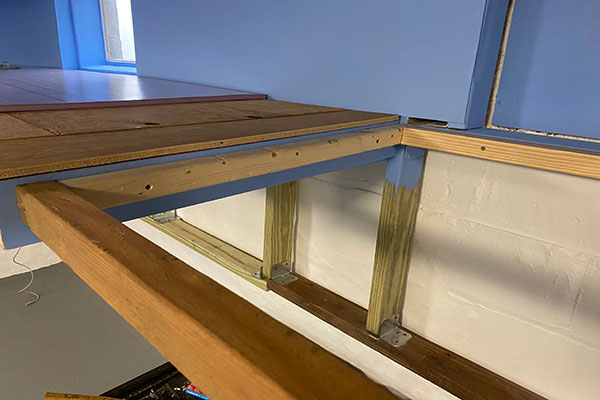
Here's a close-up of how I attached the wall framing to the joists. This combo of construction braces has provided a solid and stable start to the layout expansion. (10/17/20)

On the prototype - A steam engine heads for the Red Bank turntable on the NJS in the early 1950s. (10/17/20)
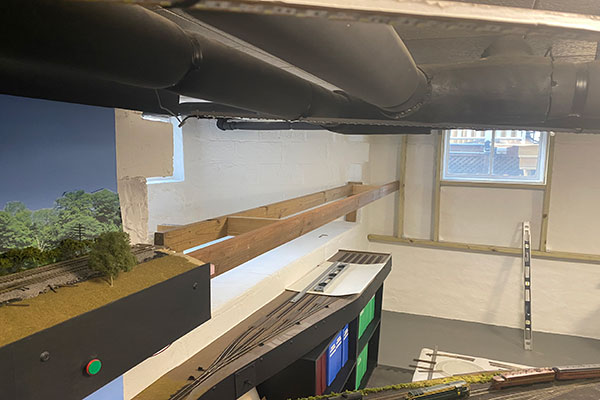
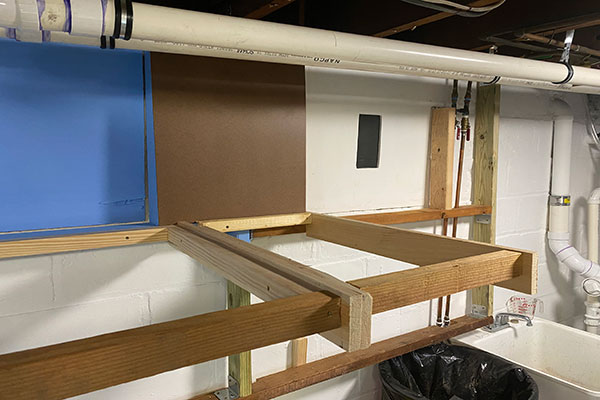
Was able to burrow to the basement for a few hours today and whipped together the frame for the Long Branch crossover. (10/18/20)
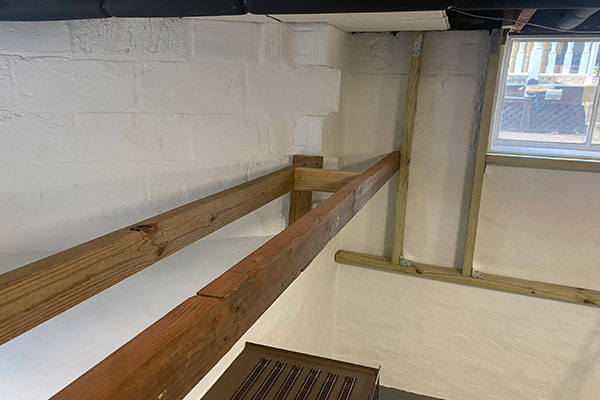
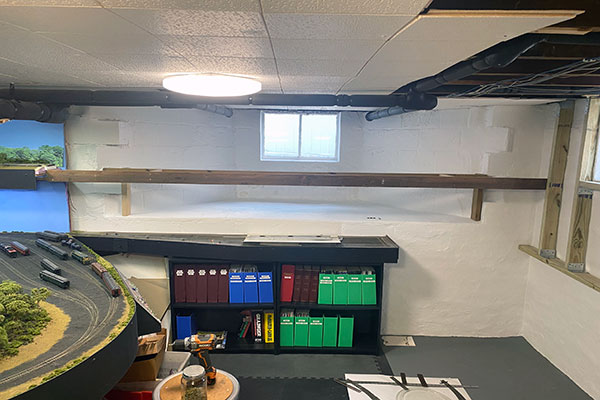
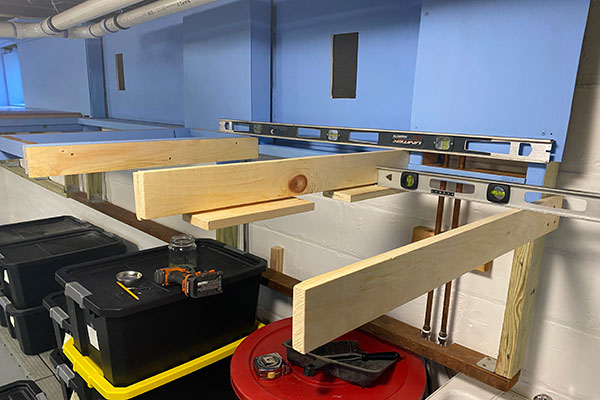
Luckily I had some straight, old 16 foot 2x4s to span the alcove. This wood is old and as hard as nails. The perfect solution for a long span. (10/18/20)
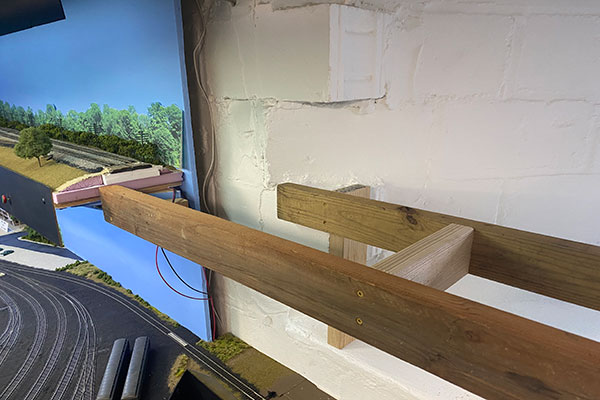
The front 2x4 is tied to the existing layout sub-frame (above) and the wall stud on the other end. The back support is connected to a riser on both ends. (10/18/20)
This setup is very strong and solid and requires no hangers from the ceiling or mid supports, keeping the underneath clear for future lower level plans. (10/18/20)

This aerial shows the NY&LB passing under Route 71 (Norwood Avenue) in Elberon. The view is looking south. Notice how the prototype makes an "S" curve centered on the bridge. (10/21/2020)

I'm going to use the underpass to separate the already modeled Allenhurst section (left) with Long Branch on the crossover (right). The S curve and Elberon Station are sacrificed unfortunately. (10/21/20)
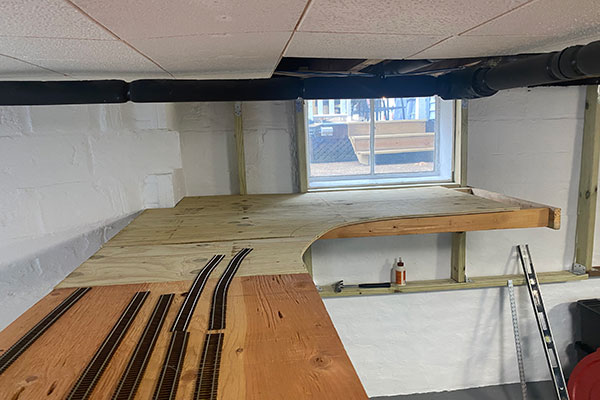
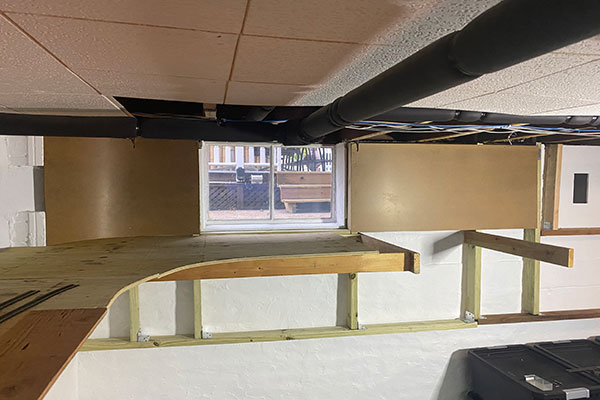
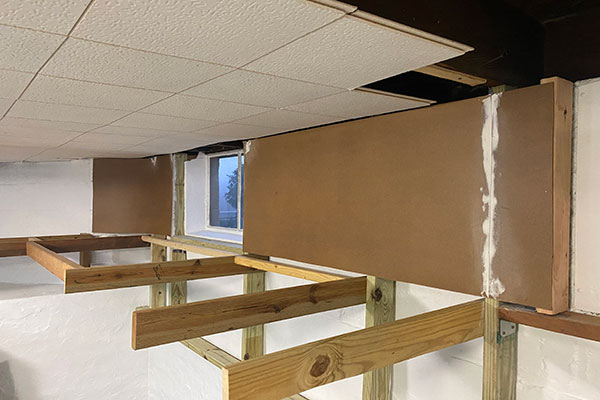
Most of the remaining wall framing has been built (right half of the photo). I still need to complete the framing around the two crawl space access hatches. Between these, and the window, this part of the layout construction is a bit more involved. (10/25/2020)
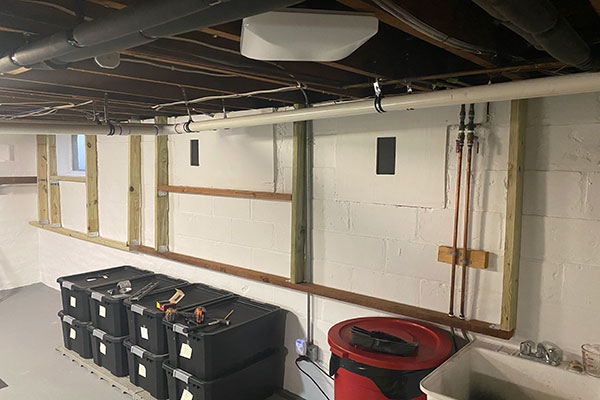
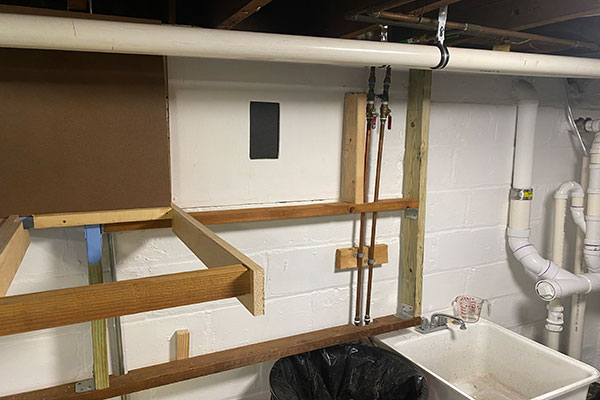
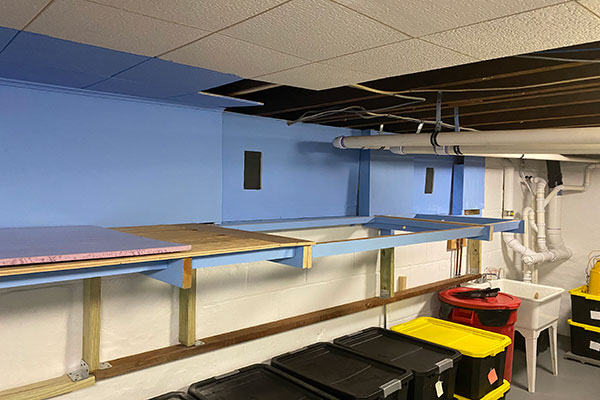
Here's another view of the entire framing project so far. Where the framing ends over the slop sink is where the entrance to the helix will begin. I'll also have to provide access to the sink water valves (right). (10/25/2020)
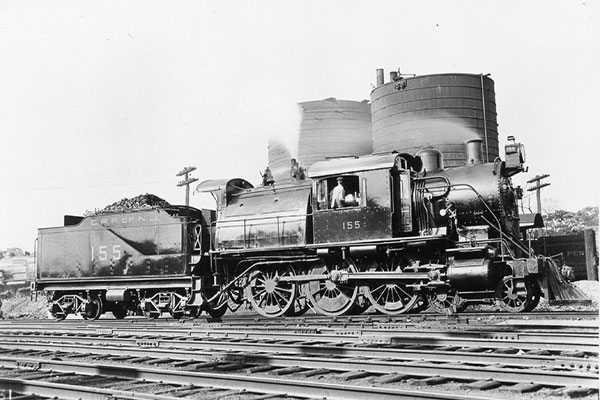
CNJ Camelback 155 is ready to connect to its consist and head eastbound to Jersey City in this circa 1908 photo in the Point Pleasant Yard. This yard was active until 1930 when the engine tracks were built at the Bay Head Loop. The tanks, ice house, turntable and engine house were quickly removed. (10/29/2020)
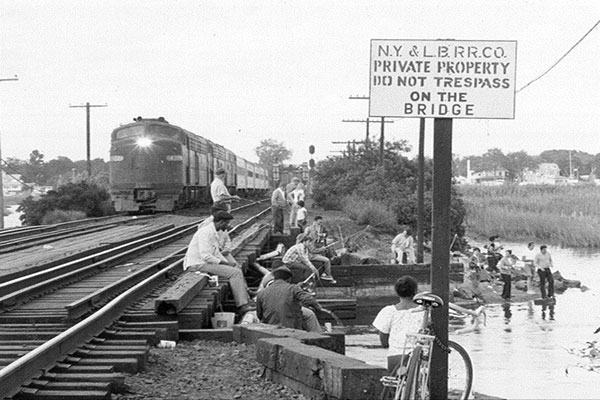
A westbound PRR commuter train passes a group of fishing enthusiasts at the Will's Hole trestle at Point Pleasant Beach. So much for the warning sign! (10/29/2020)
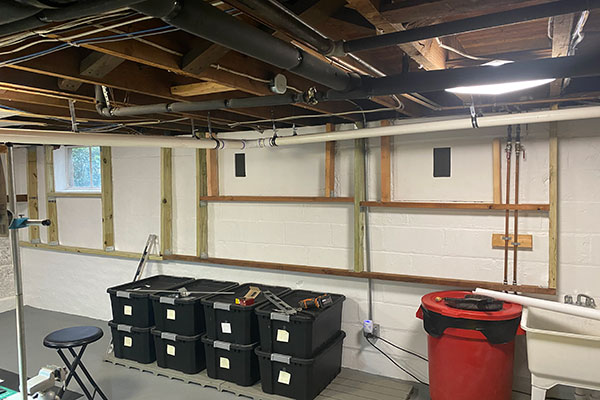
The wall framing that will support the two levels of layout along this wall is now complete. Completely hung from the upstairs floor joists, it is solid but ugly as sin right now. The window and two crawl space access doors are framed out as well. This will eventually all be covered with sheet rock or more likely hardboard. (11/01/2020)
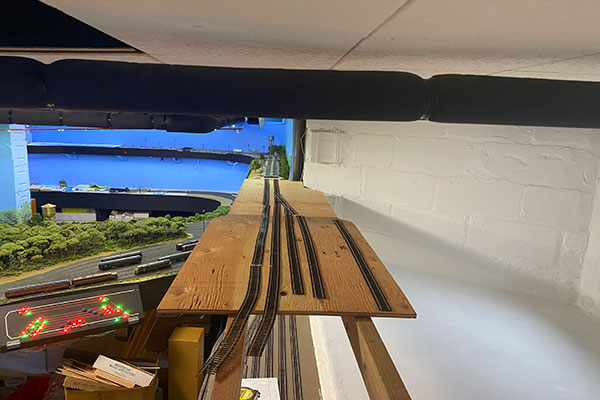
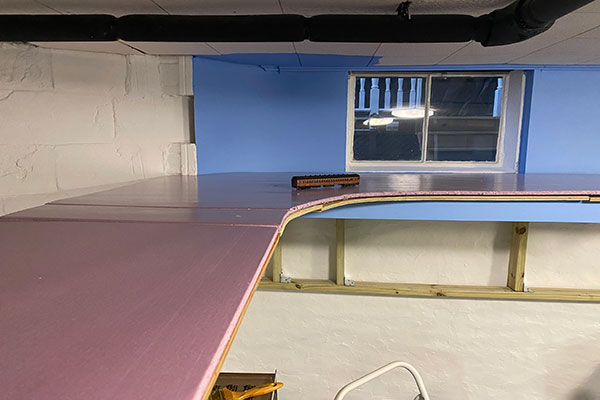
The Long Branch crossover gets the first plywood sub-base on the expansion! I decided to use 1/2 inch plywood instead or 3/4 inch (as I did on the first half of the layout) because supports are going to be a bit different and the thicker base would be overkill. The Long Branch station and company headquarters will be on the left of the tracks here. (11/01/2020)
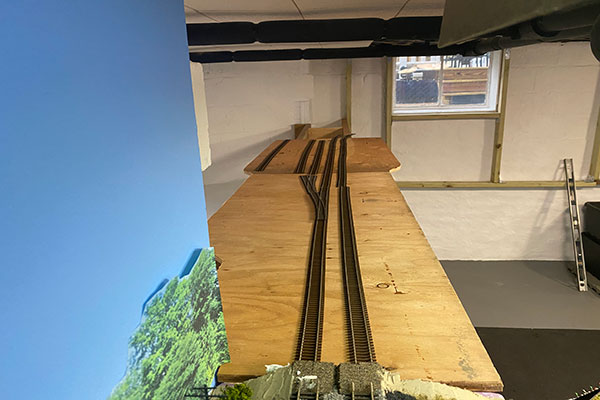
Another angle from the end of the existing layout. I have two sidings planned opposite the station, per the prototype. The single track on the far left is planned for the New Jersey Southern staging which will run across the rear. I plan to hide this staging with some type of portable view block that can be raised or lowered as required. (11/01/2020)
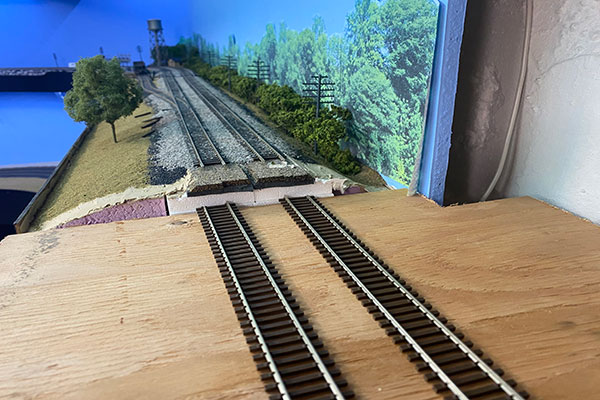
The plywood base will be covered with 1/2 inch construction foam board which will bring the level even with the existing base of the roadbed (center) and provide the means for carving ditches and depressions as it does in the first half. The Norwood Avenue overpass will be here and provide a decent scene block and a bridge feature. (11/01/2020)

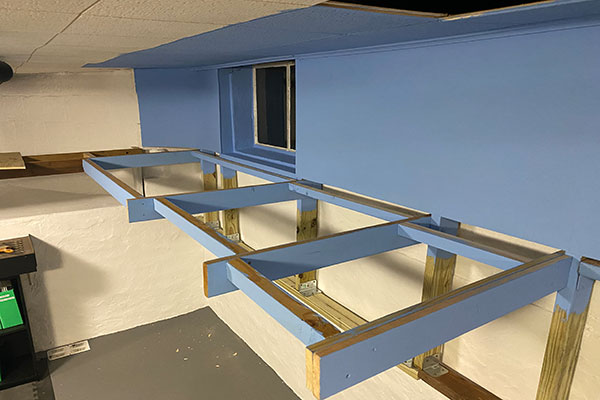
The upper level benchwork between the Long Branch crossover and Red Bank has been started. The 36 inch radius double track mainline will cross over this area. Part of the New Jersey Southern yard, turntable and mainline will occupy the rear. (11/11/2020)
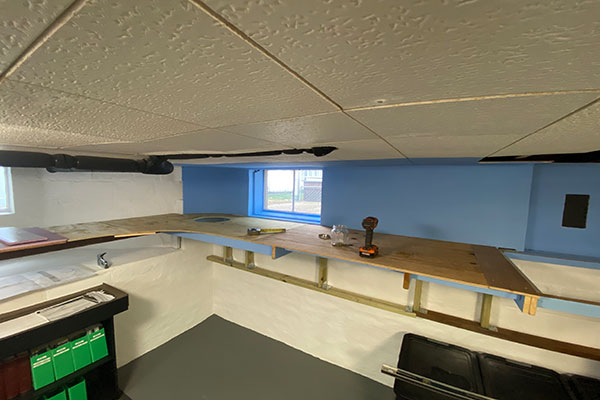
Another view of the construction. Before I can secure the plywood base, I will need to complete the installation of ceiling tiles over this area. I will also need to install hardboard for the backdrops along the wall. (11/11/2020)

I decided to go ahead and cut/fit the 1/2 inch plywood top for the curve section. I'm purposely keeping the supporting beams at a minimum what with a turntable and turnouts in this area. (11/11/2020)
Another view. I was really on the fence on whether to go with 1/2 inch or 3/4 inch plywood on this half. The main reason going 1/2 inch was the sheer number of remote turnouts on this half of the layout. (11/11/2020)
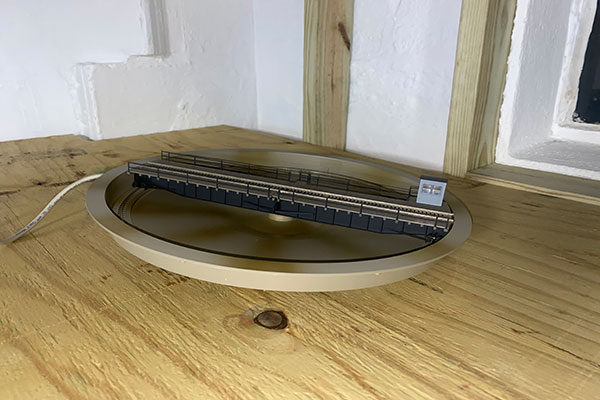
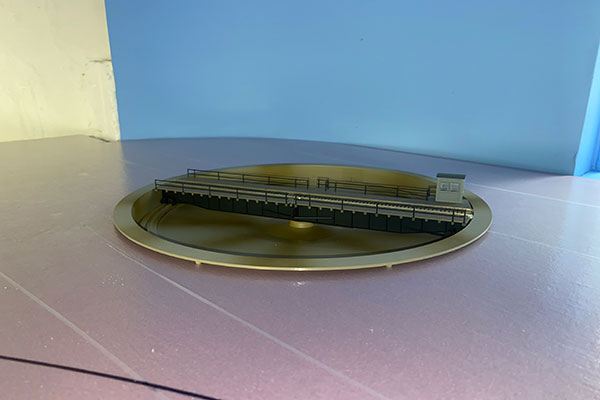
I HAD to place my Walthers 90 foot turntable on the plywood to get a feel for what's ahead. Bought this ten years ago. How time flies! (11/12/2020)
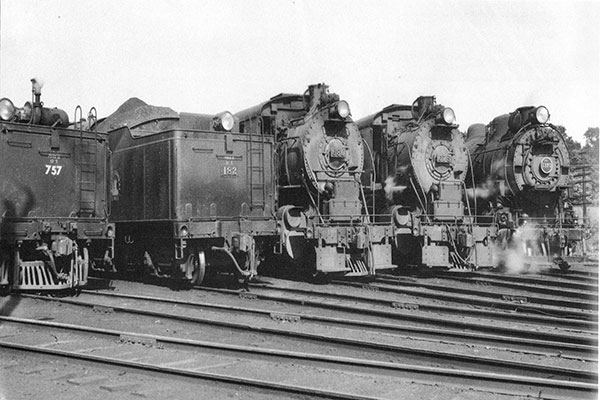
The fan tracks off the turntable in Red Bank were home to steam engine layovers, CNJ and PRR (right), in this 1947 photo. The PRR engine is an H9 while the CNJ engines are 2-8-0's and 4-6-0's. When steam was retired on the CNJ in 1952 the turntable was mothballed and eventually removed. (11/12/2020)
The first section of hardboard backdrop has been installed. I actually had a sheet of it tucked away in my garage from ten years ago during the early layout construction. I also nailed up the furring strips for the ceiling tiles. (11/15/2020)
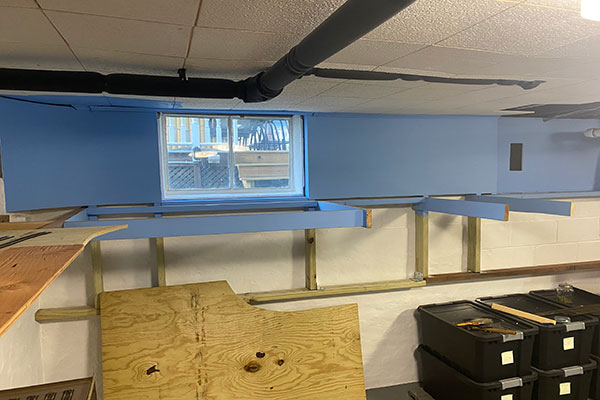
Another view showing the coved corner. The backdrop will next get a coat of primer and eventually sky blue. A box of ceiling tiles has been ordered and will hopefully arrive in a week. (11/15/2020)
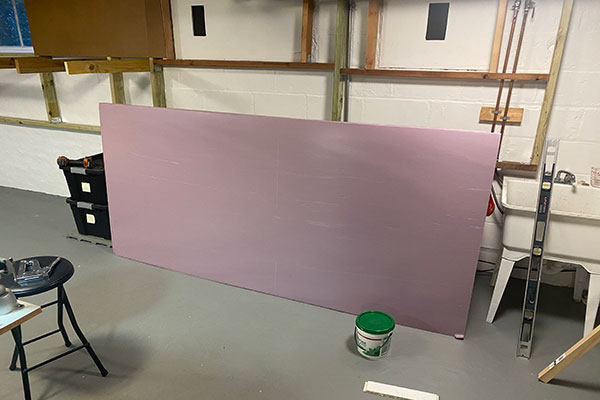
Picked up some materials for the layout, including a bucket of joint compound and two 4x8 foot sheets of 1/2 inch foam board (above). After the plywood top is screwed down I will use adhesive to attach the foam board on top. (11/22/2020)
The box of ceiling tiles also arrived and I made quick work of going through the box. One tile short - which will have to wait until the next box is ordered soon. Next up is work on the backdrop ... some seam filling and painting. (11/22/2020)
The hardboard backdrop gets a treatment of joint compound followed by a good sanding. (11/23/2020
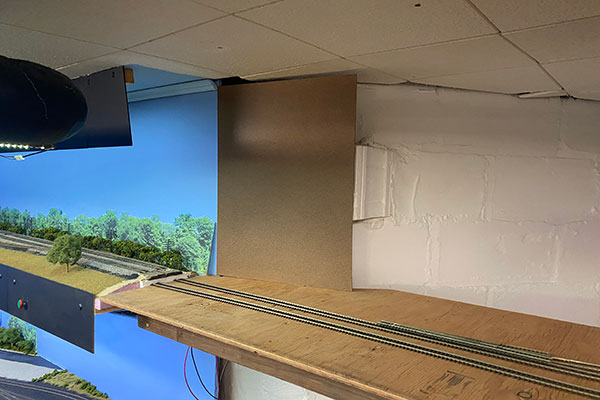
The transition area from the existing layout to the Long Branch "crossover" gets the backdrop treatment as well. (11/23/2020)
A coat of white primer paint was next applied to the hardboard backdrops. This will be followed by two coats of sky blue. (11/23/2020)

The transition piece of hardboard backdrop also got painted with primer. This piece will be permanently installed after the plywood top is secured. (11/23/2020)
The Red Bank section of backdrop is almost complete. Still needs a bit of caulking and paint touchup. The framing members were also painted now to save time and my back down the road. (11/25/2020)
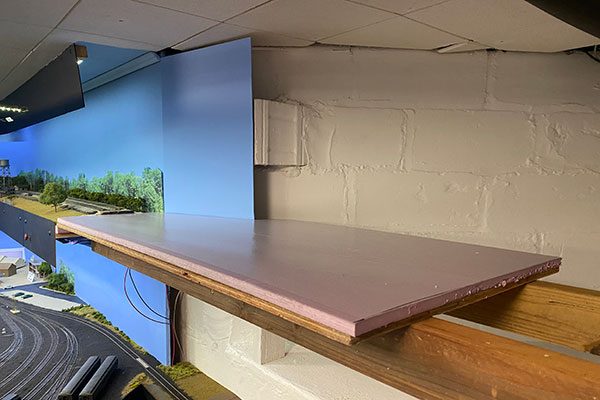
The transition from the existing layout to the new section is looking more seamless with the transition backdrop piece and a test fit of the foam board top in place. This section is ready to be screwed/glued to the beams. Happy Thanksgiving everyone! (11/25/2020)
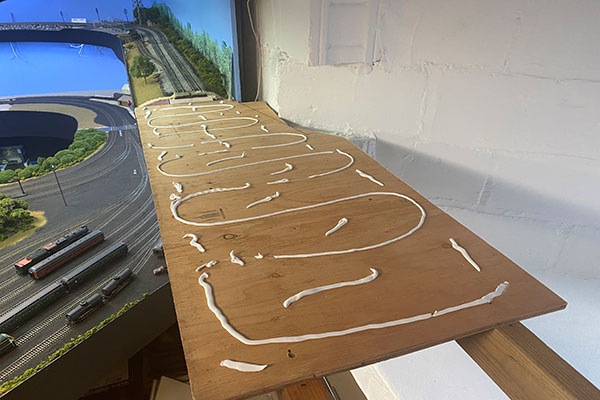
Busy weekend but I managed to squeeze enough time in to glue and screw down the first plywood top piece coming off the existing layout. Adhesive caulk was then spread on top awaiting the already cut foam top layer. (11/29/2020)
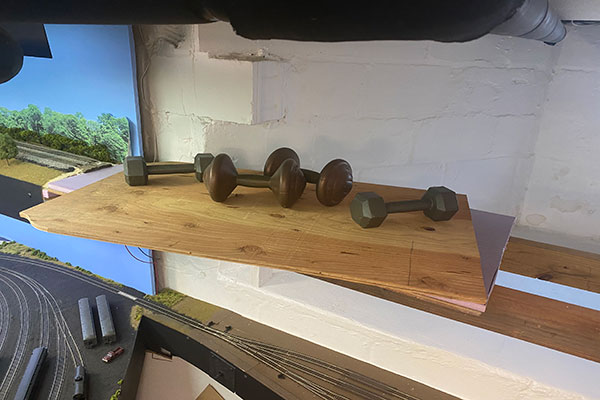
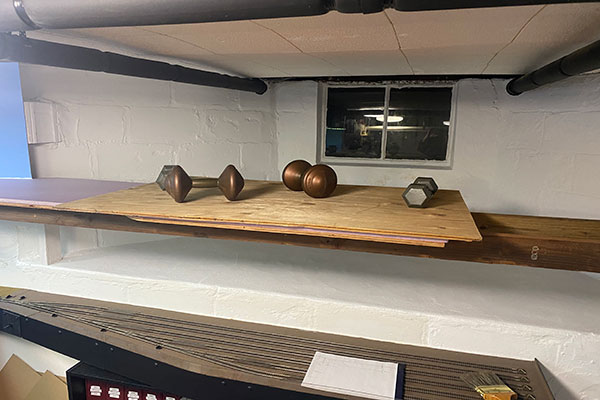
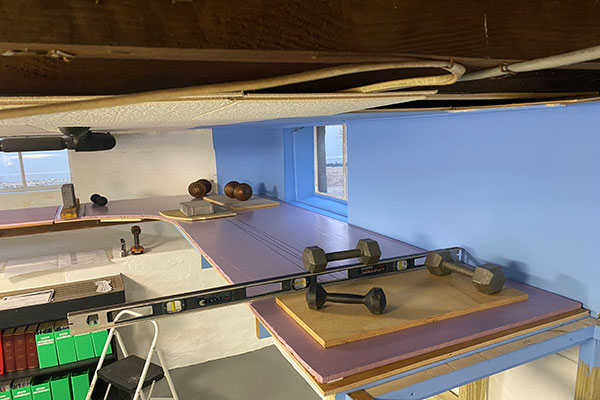
The foam board is in place and the old hand weights were brought back out and placed on top of another piece of plywood to flatten out the foam board while the caulk sets. The next section of foam board has been cut and awaits installation. (11/29/2020)
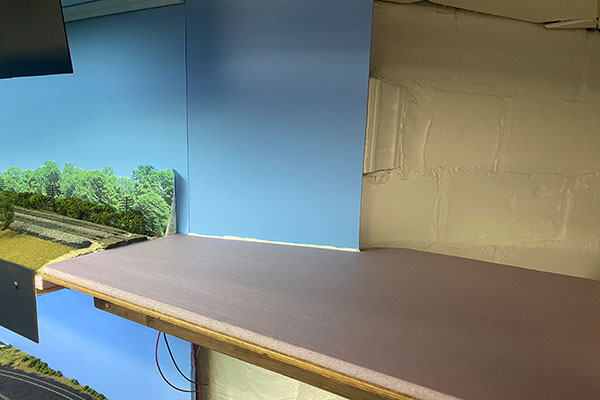
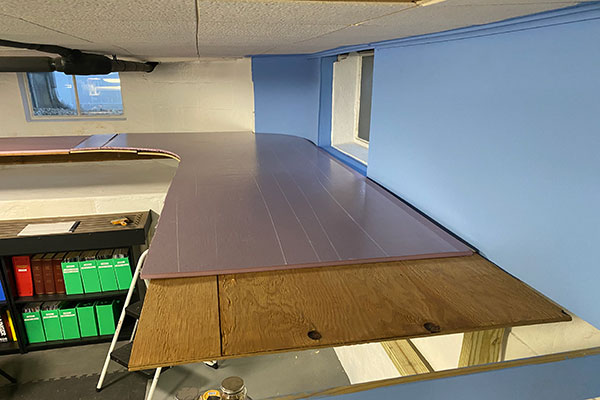
The second section of plywood and foam board are installed in the Long Branch section. Been working out the track layout in the Red Bank section before it too gets installed. Only want to do it once! (12/06/2020)
The short transitional backdrop piece was also installed. The Route 71 overpass (Norwood Avenue) will come off the center of this backdrop right toward the camera and edge of the layout. (12/06/2020)
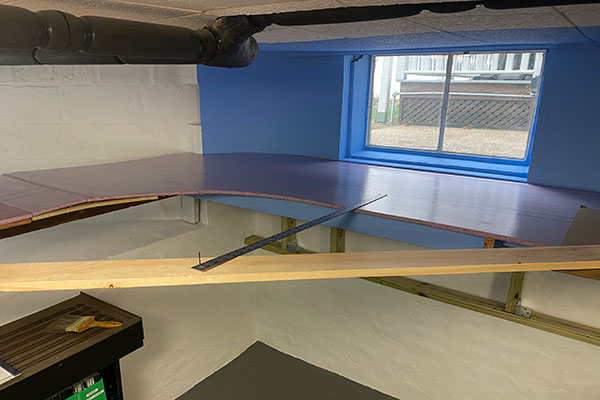
Even though I still need to do a little work on the bench work framing, I went ahead and cut the foam board for the Red Bank yard area. I may also paint the window frame blue as well to help it blend in. Then, after the turntable pit is cut out and I'm satisfied with everything, the plywood will be attached and the foam glued. (12/10/2020)
Another view with a PRR P70 coach to give some scale. For NY&LB freight operations, the Red Bank Yard (right) and Long Branch yard (lower left) were very important. I'm hoping to expand both yards beyond what I originally planned to accommodate the numerous freight operations still running during the 1950s. (12/10/2020)
The bench work framing for the Red Bank yard area is completed. The window frame has turned blue and everything here is ready for the top. I hope to get the turntable cut out this week once I locate exactly where it will go. Then the track plan will be marked on the foam board top. (12/13/2020)
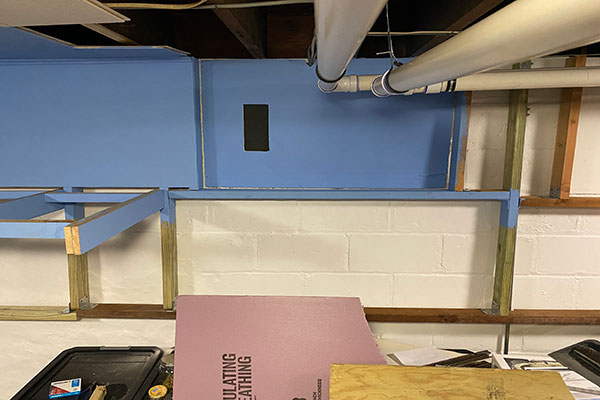
The next section of construction is going to involve an area in front of one of two access doors to the back porch crawl space (center). The dark rectangle is an air vent. This section is going to have to be removable for the unlikely event I need to get into the crawl space. I have some ideas worked out for this next section. (12/13/2020)
The first order of business before locating the CNJ turntable in the Red Bank NJ Southern yard was to mark out the mainline tracks on the foam top. (12/16/2020)
Here I'm marking the 36 inch curve between the Long Branch and Red Bank sections. This is foolproof and automatically increases the track spacing in the curve. (12/16/2020)
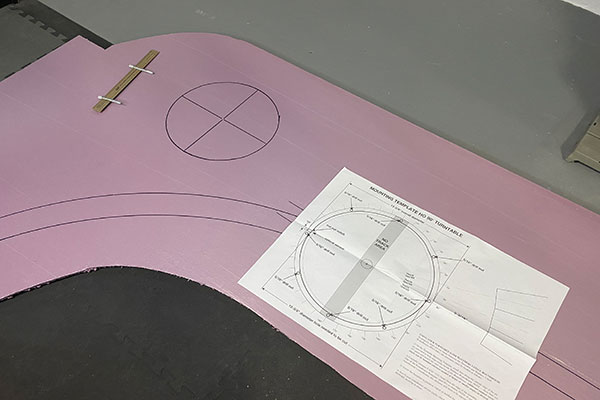
Next I removed the foam top and located the turntable pit which is 12 and 3/4 inches in diameter. Made sure it was clear of any benchwork below. (12/16/2020)
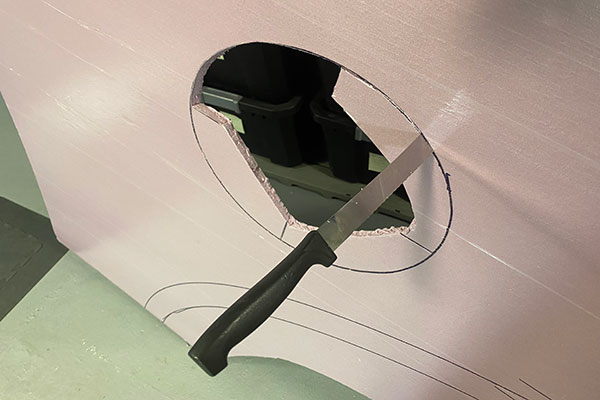
Here I used my serrated knife to cut out the marked circle. I cut out a rough smaller circle first to help keep things manageable while doing the precise cut. (12/16/2020)
I then placed the foam back on the plywood and marked the opening on the plywood top. The plywood then went out to my shop. (12/16/2020)
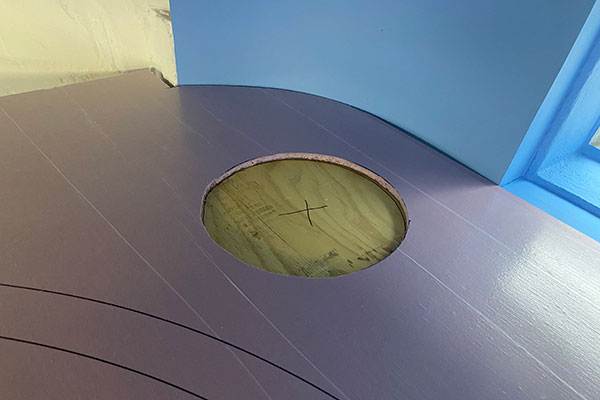
I then cut out the hole in the plywood using a jig saw. I made the hole slightly larger since the turntable assembly sits on the foam as seen above. (12/16/2020)
I revisited the Red Bank yards section with another rough layout of tracks and turnouts. I want to keep the section that needs to be removable clear of anything more that the double track mainline. That edge is at the bottom of the photo on the white paper. I'm planning to use a #4 turnout and 12.5 degree crossover at the entrance to the NJ Southern yard from the NY&LB main. (12/17/2020)

The NJS yard will utilize the ME ladder track system (white turnouts). The NJS will be double tracked through the staging area behind Long Branch (top right). The NY&LB Red Bank yard is on the other side of the mainline. After I took these photos I made further changes to the track configurations. The mainline crossover needs to be reversed and a crossover needs to be added near the entrance to the NJS yard. (12/17/2020)
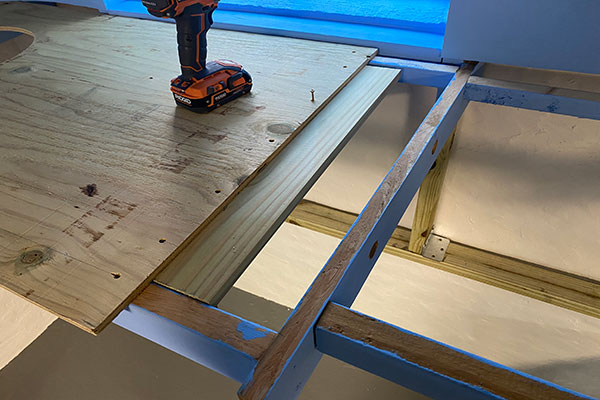
After much thought and going over all the details, I decided to proceed with attaching the layout top to the benchwork. I needed to be careful working with the 1/2 inch plywood because of its tendency to warp. I attached a splice plate (above) where two sections of plywood meet to keep them level. (12/18/2020)
All the plywood is down with a little bit of glue and a whole lot of construction screws in this wide-angle view. Long branch is on the left and the Red Bank station lift-out section is on the right. After attaching the plywood the bench top here it is rock stable. It's hard to believe now that my old big workbench once occupied this space! (12/18/2020)
Since I've planned all that I can before actual building of the tracks, it was time to also install the 1/2 inch construction foam top to the plywood. Adhesive caulk has been liberally applied to the plywood and is ready for the foam board. (12/18/2020)
The caulk gets pretty tacky after sitting several minutes so the big sheet of foam board went on and needed to be positioned quickly. The whole sheet was pretty flat but some areas got weights to help it along for the next 24 hours or so. (12/18/2020)
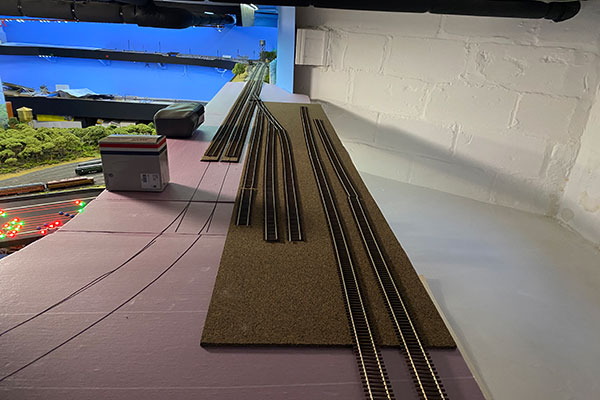
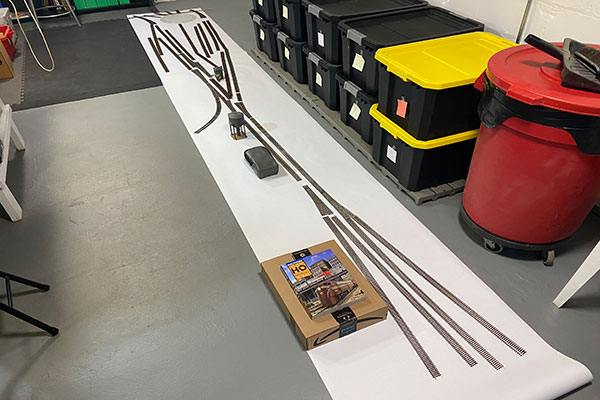
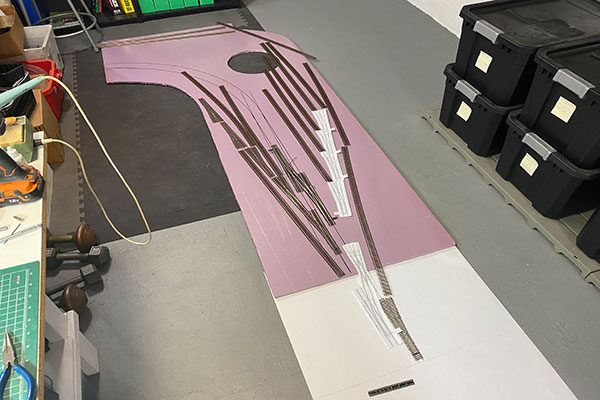
The final planning in the Long Branch section has begun with cork roadbed and tracks/turnouts placed in their planned positions. The far blob on the left will be the Long Branch Station location and the closer red white and blue striped box will be the NY&LB Headquarters building location. The Long Branch yard will hold three tracks, code 70, and extend to the end of the cork sheet. The two tracks on the right are the NJ Southern staging tracks, the right one outbound to Bridgeton, NJ and the other inbound to Red Bank. Some type of removable view block will separate these staging tracks from the mainline and yard scenes. (12/19/2020)
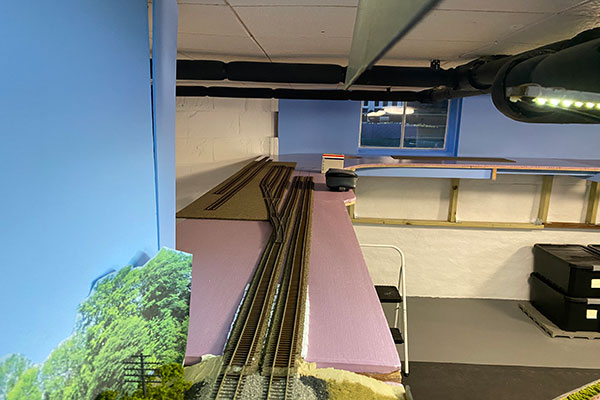
From the other end, you can immediately notice that the backdrop extension is not finished! With that out in the open, you'll also notice that the mainline tracks ramp down from the existing tracks. I decided to dump the foam camping tape as a sub-roadbed on this half of the layout as the foam board basically takes it's place. Also this part of the layout is located in towns and yards with little scale track elevation beyond the 1/4 inch cork roadbed. The Route 71 overpass will be located in the foreground over the ramps. The last track to be laid on the layout was in September 2013. It's been too long of a wait but, I think, worth it! (12/19/2020)
In the meantime, on the other end of the expansion, the frame for the lift-out section has been built. I designed it to accommodate at 4 foot long by 30 inch wide piece of 3/4 inch birch plywood. The front beam is easily removable. (12/20/2020)
I'm using the same plywood here as I did on the earlier benchwork because it's stable, strong, and straight. If I need to access the crawl space to the rear, I don't want this section flexing at all when it's lifted out! (12/20/2020)
Some more hardboard backdrop and bench framing to the second lift-out section. I very rarely need to access these two areas but they nevertheless need to be accessible. I've known from the start that these obstacles needed to be addressed. (12/20/2020)
Here is the end of the layout before heading into the future helix off to the right. I'm still trying to figure out the logistics of the mainline leaving here into the helix and modeling the iconic Navesink River bridge. (12/20/2020)
The rest of the upper level got some work. Ran out of lumber so only the backdrop got the treatment. (12/21/2020)
Before I get any further with the upper level I need to install more ceiling tiles over the layout area. They are now on order and at the mercy of the Postal Service! (12/21/2020)

Hope everyone had a great Holiday! I took a break from construction but today I squeezed in some work. I can happily report that the benchwork framing for the upper level of the second phase is now complete (mostly)! Above is the framing for the removable section for the second crawl space entrance. (12/27/2020)
The very end of the upper level drops down as shown by the lower plumb level. This will be where the Navesink River bridge will start. The bridge will extend off to the right as far as possible before I have to begin the curve into the helix. It won't be the whole bridge but hopefully enough to make it interesting. (12/27/2020)

This recent view shows the southern end of the NY&LB Navesink River Bridge over West Front Street in Red Bank. I plan to model this road and underpass at the edge of the drop-down (shown in upper right photo). Both bridge abutments are cut stone construction. The RR river span is to the right. (12/27/2020)
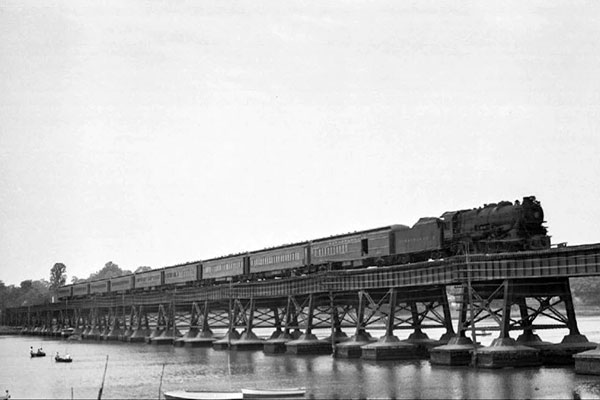
A nine car PRR train heads westbound over the Navesink circa 1955 led by K4s #1361. West Front Street and Red Bank are to the right. This span replaced the original double track wood trestle over the river in 1914. To give perspective, this view would be looking out from the layout backdrop. (12/27/2020)